


What’s bread of the wilderness?
This is a follow up to an article I posted about making this perfect primal stick-to-your-ribs survival food a few months ago. Like most things survival related, it’s best to experience it first hand before counting on it with your life. Here you’ll find my mistakes and successes making pemmican. “Doing the stuff” is more important than talking about or reading about the stuff.
Why pemmican?
Charles Washington’s Zeroing In On Health blog has a great primer on the importance and history of this survival ration. He writes,
“Pemmican has been described by many famous and influential people as being the most concentrated and nutrient-dense ration known to man yet became a marginal and even forgotten item.”

Frontiersmen, polar explorers, American Indians, fur traders, soldiers, hunters, and mountain climbers all understood the importance of carrying a lightweight, compact, food to sustain them on physically taxing adventures. Little is needed to prepare tasty (with the right recipe) “bread of the wilderness.” Just a few ounces was said to keep soldiers marching for several days. Also, with no time to cook with an open fire that might give up your position to the nearest looter population, packing pemmican is a great fuel to help get you to your hideaway.
Pack Pemmican and Less TP
Another advantage, according to Washington, is you poop less and with less offensive odor. Unless you’ve never wiped your backside in the woods with leaves, sticks, or a shirt tail, you won’t appreciate this point. Eating the low-carb, primal/paleo diet that I do, my family can confirm the odor claim. Yeah, whatever Walker! We all know your sh#t don’t stink…
There are many recipes online for pemmican. Here’s what I used.
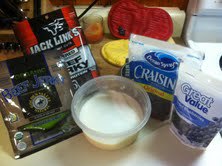
Ingredients
- 9 oz. of beef jerky: I would have preferred to use homemade jerky (venison or beef) but I’m out. So I went with 6.2 oz. and 3.0 oz. bags.
- 3 oz. of dehydrated blue berries and maybe a couple of ounces of cranberries. I didn’t measure.
- About two inches of melted tallow in a pint mason jar. Again, not exact measurements. I buy my organic beef fat from a local butcher and render it myself. Frying with tallow beats veggie oils and Crisco which is only a few molecules away from plastic.
You want to grind the jerky into as fine a power as possible. I used a food processor. NOTE: If using store bought jerky, you’ll want to dehydrate it in the oven (or dehydrator) until it is brittle when bent. I tossed this batch in the processor and it didn’t give me the desired powdery texture. I dumped the chopped meat into a pan and placed it in the oven at 175° with the oven door cracked slightly to vent moisture.
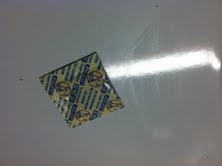
Be sure to remove these before processing store bought jerky. I almost ground this one up.
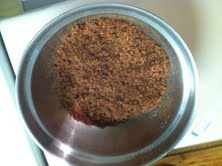
Dusty ground jerky
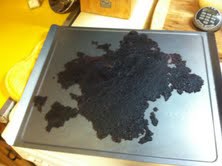
I loaded the fruit into the processor thinking I’d create fruit dust. Wrong! All those little individual pieces turned into one huge glob of fruit. Not what you want to happen. You’re going for a powdery mixture on the fruit as well. Some say a few chunks are okay. To remedy this, I rolled the fruit ball out into a thin layer on a cookie sheet and tossed it in the oven with the jerky.

Too much moisture leads to a fruit ball!
I stirred the jerky every hour and poked the fruit. After about 3 hours and no more patience, I took both out and let them cool. The fruit tasted like a fruit roll-up. Very yummy! The fruit hardened after cooling. I then added these two back into the processor at the same time and let her rip. With more moisture evaporated, both the meat and fruit broke down into smaller pieces.

Now comes the best part. Add the liquefied tallow in small increments in a container with the ground jerky and fruit. Hand mix as you go. You want enough fat in the mixture to be able to hold the ingredients together. Too much liquid fat will cause a soupy mixture that won’t hold together. Too dry and it crumbles.
Once you’re satisfied with the consistency, give it a test. Take a scoop into your hand and form it into a ball. I squeezed mine into a log shape. Dirt Road Girl said that the shape I created was very unappetizing. It reminded her of cleaning up after our two mongrel mutts in the backyard. A good buddy of mine who cooks in BBQ competitions told me that we eat with our eyes. If that’s the case, you may want to spread your pemmican out in a Pyrex dish and cut them into more appealing brownie shaped bars – for your eye’s sake.
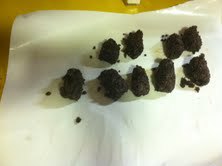
Either way, they turned out fine to me. They will store without refrigeration – if I don’t eat them beforehand. My next batch, I’m adding a little spice like cayenne pepper. Kick it up a notch!
On my last pemmican post, Matthew from Jimmy Cracked Corn, asked me for an honest assessment on the taste. Here’s what I think Matthew. It’s not something I’d serve at the dinner table with company. It is very tasty, nutrient-dense, and long-lasting – both as a storage food and fuel in the body. It’s an acquired taste I’d say. It’s a survival food.
Other recipes:
http://www.wildernesscollege.com/pemmican-recipes.html
Keep Doing the Stuff,
Todd
If you find value in our blog, Dirt Road Girl and I would appreciate your vote on Top Prepper Sites! You can vote daily by clicking here or on the image below. Check out all the other value-adding sites while you’re there…

Thanks for Sharing the Stuff!
Copyright: Content on this site (unless the work of a third-party) may be shared freely in digital form, in part or whole, for non-commercial use with a link back to this site crediting the author. All links in articles must remain intact as originally posted in order to be republished. If you are interested a third-party article, please contact the author directly for republishing information.
by Todd Walker
Good info