


To live more sustainably, I have a small garden bed in my backyard to grow food for my family. Although it isn’t as large as I would like it be and certainly could not grow a year’s worth of food, I am able to grow plenty of fresh vegetables to make sauces, salsas and salad ingredients. As well, I utilize my patio as a container garden to grow bush-type varieties in pots. Using the space I have to the best of its ability saves me money and, best of all, I have the satisfaction of knowing how my food is grown.
Getting My Seeds Started
To gear up for the garden season, I save lots of newspapers (one of my favorite items to keep on hand) ahead of time to use in the garden. I love the sheet-mulching or the lasagna gardening method, so I add lots of newspaper to my garden. As well, I use recycled newspaper to make seed pots. You can learn how to make your own, or use this handy device to secure the paper to make pots.
To keep the cost down on gardening, I make my own seed starting mix. I usually make my own compost. Here are 80+ items to add to your compost pile. This is the best recipe I have found:
- 4 parts screened compost
- 1 part perlite
- 1 part vermiculite
- 2 parts coir
Note: To keep the dust down, lightly moisten the ingredients before blending them thoroughly in a dishpan or wheelbarrow.
Place two or three seeds on the surface, and gently press the seeds down so they are nestled into the mix. If your seeds are very small, like basil or peppers, you can leave them uncovered. If your seeds are larger, like beans or peas, or they require darkness to germinate, cover them with a layer of vermiculite or seed starting mix equal to their height, usually 1/4 inch to 1/2 inch.
I usually start my seeds indoors in January to give them ample time to grow and establish their roots before I find their permanent homes in my outdoor garden. Rather than purchasing a Jiffy Pot Greenhouse kit each year, I have learned how to make my own. All you need is a used rotisserie chicken plastic container, plastic clamshells that previously held baked goods or even fast food salad containers. These are all great containers for creating a diy hot house for growing seeds. Ideally, you want to add drainage holes at the bottom of whichever container you use so that your seedlings do not sit idly in water, as this can cause root rot and molds grow.

Which Seeds to Grow
Determining when to start plants indoors depends on when the last frost typically occurs where you live, and then counting backward based on the type of plants you want to grow. The seeds I have chosen to grow early in the season are the ones that take between 60-90 days to mature. Seeds such as, tomatoes, eggplant, peppers, melons, squash and herbs. As well, I am regrowing some of my food scraps to add to the garden once their roots are established.
If you are short on garden space, many of these varieties can be grown on the patio or deck. In fact, I have a very successful winter patio garden that I started where I grow spinach, lettuce, herbs and kale. These are great for patio gardens because they are shallow rooted, meaning they do not have large root systems that take up a lot of space – all you need is a deep garden pot. The following is a listing of plants that grow well in containers:
- Tomatoes
- Beans
- Peppers
- Lettuce
- Cabbage
- Mustard greens
- Carrots
- Turnips
- Onions
- Garlic
- Radishes
- Potatoes
- Most herbs
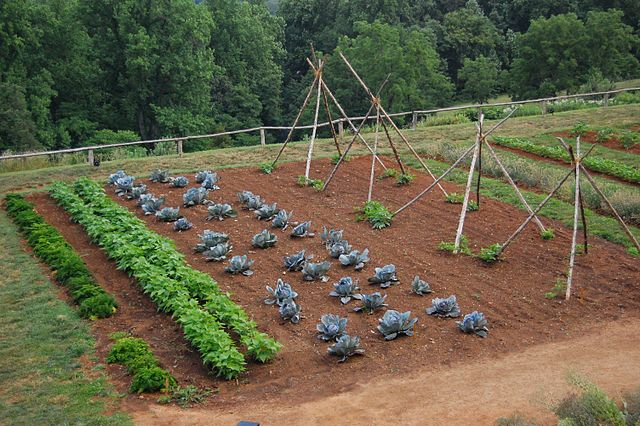
Prepping the Garden Space
Initially, before you put the plants in the ground you need to prep your garden space. This will give you ample time to prepare your beds and condition and layer the soil. I use a lot of natural gardening methods that I have learned over the years.
1. Don’t work the soil too early.
This website discusses the dangers of working the soil too early. “Working the soil too early is a mistake. When the earth is still saturated with melting snow or spring rain, it is easily compacted by treading across it, or even worse, driving heavy equipment on it. In addition, large clumps of wet soil turned over at this time will only bake into impervious clods that will be very difficult to break up later…
How can you tell whether your garden has dried out enough to be worked? The truest test of soil condition is that age-old gesture of the gardener—fingering a handful of soil. Pick up about half a cup of earth in your hand. Now squeeze the soil together so that it forms a ball. If the ball of earth can readily be shattered by pressing with your fingers or dropping it from a height of 3 feet or so, it is dry enough to dig. If the ball keeps its shape or breaks only with difficulty into solid sections rather than loose soil, it still contains too much water. Clay soil that is too wet will feel slick when rubbed between thumb and forefinger. If it is very wet (75 to 100 percent moisture), the mass will be pliable, and a ribbon of earth can be drawn out and pressed with your finger. Working soil that wet can spoil its texture for the whole season.”
2. Clear debris.
Removing any leaves, pine needles or debris from the garden will ensure that your transplants will have the best living conditions and the soil will drain efficiently. Because many compost piles are short on carbon-rich materials, add the debris and items you remove into the compost pile.
3. Declare war against weeds.
Wedding now, while the weeds are still young and tender is the best time to remove. Waiting until their root systems have established and the weeds have grown will make it more difficult to remove. As well, by removing them now, you can add any additional soil amendments to make the soil more fertile. As well, you will want to “dead head” and clear dead foliage and add to the compost pile.
4. Repair beds, trellises or fencing.
The high winds and heavy moisture from winter can damage garden beds, trellises and fencing. Repairing them now when there is less growth to work around and fewer roots to disturb. Doing so will help better protect your plants.
5. Top dress your beds.
The spring is the best time to add soil amendments. Resist the urge to dig the bed; established beds have a complex soil ecosystem which is best left undisturbed. Nutrients added from the top will work their way down into the soil. I usually add a of compostables (egg shells, paper, food scraps, bits of cardboard, etc.), then I add layers of soil amenders, add some water and leave the bed alone. Some of my favorite soil amenders are:
I usually mix these up together in a wheelbarrow and add them to the garden.
Living sustainably and starting a garden is economical and will help your children learn the essential skill of growing food as naturally as possible. In addition, it helps you use compostable items in the garden that you would otherwise throw away. Use these time-tested gardening tips will ensure your garden is a successful one.