


I love composting all the kitchen scraps I can, but when I fill up my compost bin or run low on some vegetables in the garden, using kitchen scraps to grow plants is a great activity.
I love using kitchen scraps to start new plants as a fun gardening activity with my son. Every day, we check and see how the plants are progressing. It’s a great way to come full circle on the produce we bout at the market together and cooked together. Starting your own plants from kitchen scraps is really easy and for a gardening nerd like me!

If You are going to attempt this, I suggest making sure the scraps you start with are good quality. I like to use organic produce grown locally when I start plants from kitchen scraps.
17 Plants You Can Grow from Kitchen Scraps Easily
1-4. Growing Leeks, Spring Onions, Scallions, and Fennel
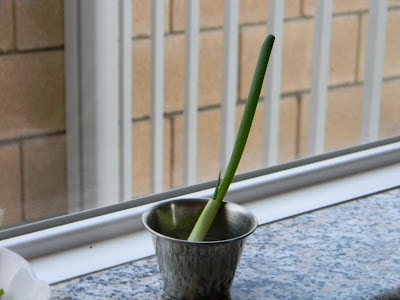
You could go out and buy some vegetable specifically for growing, but I like to wait until I actually have a call for them in my cooking. With all 5 of these examples, you will use the end of the vegetable with the white roots.
Take the leftover white roots and place them in a container with a small amount of water in it. You want the roots to be wet, but you don’t want the entire thing submerged. Take your container and place it in a sunny window sill. I’ve actually grown green onion scraps in a fairly shady window on the North side of our house, but your success may vary. I like keeping some in a window in the kitchen for my morning eggs, and in my office for snacking on (the wife loves kissing me after that).
Within 3-5 days, you will begin to see new growth come up. Remove the produce as you need and just leave the roots in the water to continually harvest your kitchen scrap crops. You should refresh the water weekly to keep the plant healthy.
5. Growing Lemongrass

Lemongrass is similar to all other grasses, and because of that, you just need to place the roots you cut off into a container with water and put in a sunny window. In my experience, the lemongrass is a little more dependent than green onions and leeks from above.
After about a week, there should be some new growth from your lemongrass. Once you have new growth, you will need to transplant the plant from the water into a pot with soil and put it back into the sunny windowsill. You want to wait till your lemongrass reaches a foot tall before you begin harvesting it. Just like before, cut off what you plan to use in the kitchen and allow the roots continue to sprout. It’s just like cutting your lawn; it will just keep coming on if you keep it healthy.
6-9. Growing Romaine Lettuce, Celery, Bok Choy & Cabbage
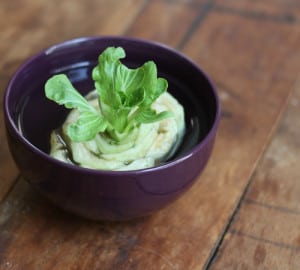
Just like the scallions, you will take the white roots of these vegetables to grow your produce. By cutting off the stalks or leaves with an inch or more and placing them into a bowl of water with the roots facing down, you will be on your way. You want to make sure the roots are in the water, but you don’t want to submerge the entire plant. Make sure to place the bowl in a sunny window and spritz it with water weekly to keep the top of the plant moist.
Several days later, you will begin to see the roots and leaves sprouting. 7 to 10 days in, remove the plant from the water and plant it into the soil with only the leaves above the soil. Your plant will continue to grow, and in several weeks, you will have a new head ready to be harvested.
If you want a different way to go with your plant, you can try planting directly into the soil, skipping the water staging step from before. Keeping the soil from drying out will be very important that first week.
10. Growing Ginger
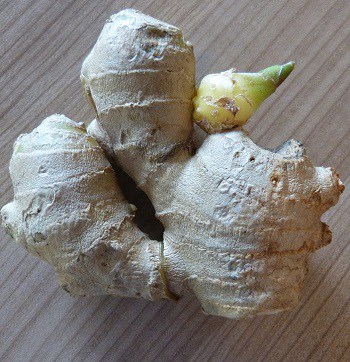
If you’re looking for an easy plant to grow indoors, Ginger is the one for you. Just take your chunk of Ginger from your kitchen scraps and place it into the soil. Make sure the newest buds are facing up. Unlike the other plants we’ve talked about so far, Ginger will enjoy filtered light rather than direct sunlight.
Soon enough, you will begin to see new growth sprouting up out of the soil, and under the soil, roots will begin to sprawl out into the soil. After the plant acclimates to its new home, you will be ready to harvest the next time you need Ginger. Pull the entire plant out of the soil and cut off the pieces you need, and just replant it like you did initially.
As an added bonus for you, Ginger makes a great house-plant. Even if ginger isn’t your thing, as far as cooking goes, you can still get some aesthetic value out of the plant.
11. Growing Potatoes
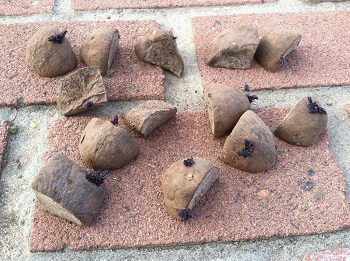
Taking potatoes from produce back to growing is a great way to keep more waste out of the garbage. You can grow any variety of potato you like; it should just make sure the scrap has ‘eyes’ growing on it. With a potato that has a strong presence of eyes, you can chop it up into 2-inch square pieces.
Make sure each piece has 1 – 2 eyes. After you’ve cut your potato into pieces, leave them out in room temperature for a couple of days. Leaving the pieces out allows the cut surface area to dry out and becomes callous, which will prevent the pieces from rotting in the ground.
Potatoes need very nutrient-rich soil, so if you have compost, you should be sure to incorporate some into your soil before you plant it. When you are planting your potato cubes, make sure they are in the 8-inch depth range with the eyes facing the sky. When you backfill your cube, place 4 inches over the potato cube and leave the other 4 inches empty. Over time, as your potato grows and roots begin to appear, you will want to add more soil.
12. Growing Garlic
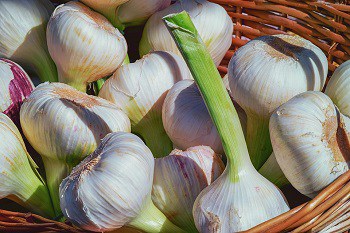
You only need a single clove to regrow an entire garlic plant, just place the end with the root down into the soil. Place your container in a warm part of your home with direct sunlight and sit back and wait for the garlic to root itself and begin to send up new shoots.
After the garlic becomes established in the soil, cut back the shoots, and the plant will begin to put all its resources into growing a big delicious garlic bulb. Just like the ginger above, once you harvest your produce, you can repeat this process and run through the cycle again.
13. Growing Onions
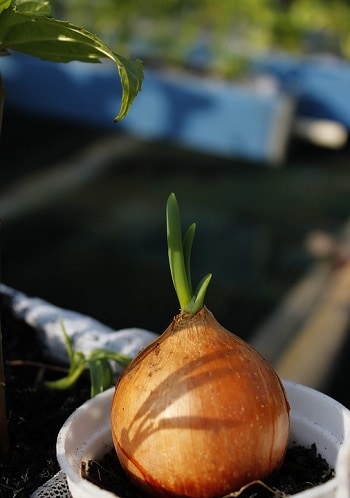
With onions, you’re going to use the root end you cut off when prepping to cook your onions. Onions are great because of the ease to propagate. You want to try to keep half-an-inch of onion above the roots. You will want to take your cutting and place it into your soil in a sunny place and cover the top with topsoil.
Keeping your soil moist will be very important while the onion begins to establish itself. If you’re in the North East like me, you will want to keep the onion indoors in a container during the winter.
If you repeat the cycle and keep planting the onion roots, eventually you should have enough onion plants growing that you’ll become onion self-sufficient!
14. Growing Sweet Potatoes
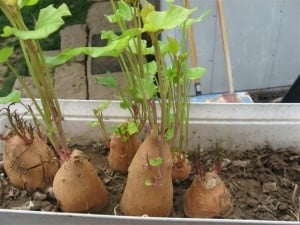
When you plant sweet potatoes, you want to use the ‘eyes’ just like you do with a regular potato. You can bury the entire potato or pieces like you did with regular potatoes under a thin layer of topsoil in a damp and sunny place.
Soon, you will have new shoots beginning to appear from the soil. When the shoots begin to reach a height of four inches, you will replant your pieces, giving them around 12 inches between one another. Generally, it takes somewhere around 4 months to grow sweet potatoes like this. Keep a watchful eye out for slugs; they will be trying to eat your crop before you can.
When you’re growing your own sweet potatoes, you want to be sure and use organic soil as most commercial growers use chemicals to keep them from shooting.
15. Growing Mushrooms
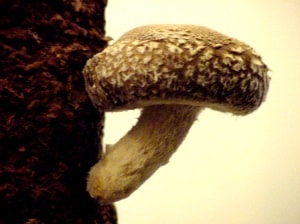
For the most part, I’ve focused on plants that are pretty easy to grow, but propagating mushrooms is not included in that. If you’re going to try to propagate mushrooms, you’ll be competing with the other fungi space. Mushroom spores enjoy the warm humidity and nutrient-rich soil; cooler temperatures will give your mushrooms a higher likelihood of success against other fungi.
You want to grow mushrooms in a pot. Trying to grow them in your garden would have too much competition from other mushrooms. Growing mushrooms inside of a container also allow you to mow the container around and provide different conditions for the mushrooms, which will help them propagate faster. I’ve experienced the greatest success by providing a warm filtered light during the day and cool temperatures at night.
To get your mushrooms to propagate, take off the head and place the stalk into your topsoil, making sure to expose the top to the air. If you have the right conditions for your mushroom, you will have a new head grow from your base. You should have some obvious feedback if your mushroom has taken or not very quickly.
16. Growing Pineapple
To start growing pineapple, you will need to take the leafy green top and remove all the fruit (yellow parts). To harvest a starting piece form a pineapple, take a good grip of the leaves and twist the crown off of the fruit.
If the brute force tactic isn’t for you, you can take a good chef’s knife and slice off the top of the pineapple and scrape off the flesh of the fruit with a spoon. Take a sharp knife and begin to slice small horizontal pieces off of the bottom of the crown till you can see root buds (pictured left). Peel off a few layers of the leaves from the base of your pineapple cutting.
With your prepped pineapple cutting, prepare a container of warm water and place it cut side into the container. When the cutting begins to root, replant it into a container with soil and be sure to water once a week. This kitchen scrap recycling is a long game; you won’t have a pineapple worth harvesting for 2-3 years.
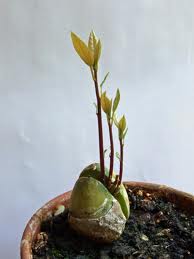
17. Avocados
Rather than tossing your avocado seed, when you’re getting the fleshy fruit for your cooking, use it to grow your own avocado plant. Warning: this one is going to take even longer to fruit than the pineapple, if ever. House-grown avocado plants rarely fruit, and if you can grow it outdoors, it could be 5 to 13 years before eating your own avocados. People who farm avocados grew them off grafts (maybe a good idea for another article?!).

Take your seed and wash in the sink. With your cleaned seed, stick in three or four toothpicks and suspend it above a glass of water. You want to place the seed’s broad end down and cover the seed with around an inch of water.
Place your container in a warm area in an area with filtered sunlight and add water as needed. Within 2 – 6 weeks, you will see roots and a stem begin to sprout. Once your avocado has a stem that is 7 inches long, cut it back to 3 inches.
This will focus the seeds back into growing a strong root system. When your roots are thick, and the stem has re-leafed, take out the toothpicks and place the plant into a rich humus soil. I suggest using a 10-inch diameter pot. Leave the seed half exposed when you plant it into the soil.
Now that your plant is in the soil, you want to supply it with a continual supply of light watering with an occasional deep soak. Avocados prefer a soil kept moist, but you want to avoid saturating it too much and drowning the roots.
If your leaves begin to turn yellow, it means you are overwatering it. Give the plant a few days off from watering. Now that the plant is established, you want to begin to give it as much sunlight as you can.
If you notice that your leaves are starting to brown at the tips, you have a salt buildup in your soil, and you will need to water the soil thoroughly and let it drain. Once your stem reaches 12 inches in height, you will want to cut it back to 6 inches to help new shoots grow.
18. Growing Carrot-Tops (Fun for the Kids)
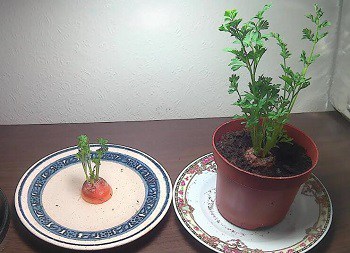
Because carrots are a taproot, you can’t actually regrow the part we all eat. You can, however, grow a fun, attractive flowering plant for your kitchen. Growing the carrots is my son’s favorite from this list.
The next time you buy carrots for cooking, cut off the tops, leaving an inch or so of the vegetable attached. Just like the avocado, take several toothpicks and stick them into the side of the carrot. Place your carrot, cutting into a container with water high enough to reach the bottom of your cutting.

Place your container in an area that will receive filtered sunlight and make sure that as the water evaporates or is consumed by the carrot, you replace it to keep the bottom of the carrot wet. Within a few days, you should see the roots begin to sprout. When you see your roots sprouting, you can transplant the plant into a bed of soil.
Summary
Depending on your conditions, your success may vary from mine. God knows I’m not always successful with my attempts. These are great activities for black thumbs because you’re using kitchen scraps rather than spending money on saplings or seeds. Do you have any suggestions of plants we missed?
source : Mike McGroarty