


Making cordage is a fundamental survival skill that should not be overlooked. Such natural rope or string can be used for many things including bow-and-drill friction fires, as a snare or fishing line, as lashing in shelter construction, repairing or creating clothing, and much more!
It can be made out of various materials including the fibers of various wildflowers, inner fibers of yucca or agave, the inner bark of some trees and the sinew of large game animals. There is a variety of different types, but one of the most common is the reverse wrap, which will be discussed here.

What species to choose?
It is great to start making natural cord with common local species from your area. Some of the most common species that are useful for cordage making include:
– Stinging Nettle (Urtica dioica): fibers inside stalk
– Milkweed (Asclepias syriaca and related species): fibers inside stalk
– Dogbane (Apocynum cannabinum): fibers inside stalk
– Yucca (Yucca species):Fibers inside leaves
– Agave (Agave species): fibers inside leaves
– Basswood (Tilia Americana and related species): inner bark
– Western red cedar (Thuja plicata): inner bark
Look for these –especially the first 3 – in your area, and practice with them.
When it comes to harvesting for the best cordage, it is often best to collect the plants at the end of the growing season. For instance, with stinging nettle, I recommend collecting them at the end of the summer when they are going to seed. Strip the seeds off and drop them, so that you will keep the nettle stand growing thickly in the future. This is a good ethical practice with any wildflowers you harvest, allowing them to regenerate and not depleting them. See the seeds hanging off of this nettle plant in the photo below.

Cut the stems off close to the ground, and collect them into a bundle. Dry the bundle by hanging it up in a cool, dry place. The leaves can be used as a tea or as good mulch.

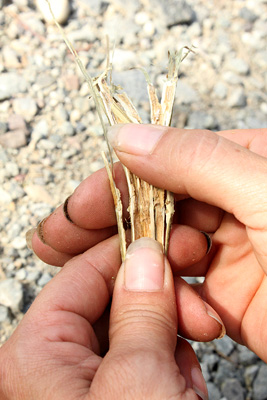
Take a look at these dried and stripped stems in the photo above. They have been allowed to season indoors, in a cool, dry place for months. You don’t need to dry them for that long. Just dry them long enough to allow them to be completely dry, so that they are crispy when you break them.
Processing: Pounding and Peeling

The method mention here is to get as much fine fibers out of the plant as possible. Remember that there are other methods to process nettle, some much faster but less thorough.
Once your bundles have dried, take them down and begin processing them. First, take a single stalk and place it on a hard surface such as a smooth rock or piece of board. Take a heavy branch or smooth rock and gently pound the full length of the stalk. Take a little more time pounding the stalk at each joint, as the joints have the thickest woody sections.
Once you are done pounding, take the stalk in your hands and run your thumbnail or knife down the inside of the stem and as far down the stem as you can. When you do this part correctly, you should be able to peel it so folds open like a book.
Once you are done pounding, take the stalk in your hands and run your thumbnail or knife down the inside of the stem and as far down the stem as you can. When you do this part correctly, you should be able to peel it so folds open like a book.
Take the open stalk and lay it onto your hand, so that 1-2” project beyond your hand. Now fold that projecting part over and then back again. As you do this, the woody portion of the stalk should start to peel away from the softer, fibrous portion. Move it backward and forward until the woody portion separates from the fibers.
Be careful to pick as much of the woody pieces out of the fibers now, and it will save you more work later. Continue to do this as far down the stem as the plant and your skill allows for. Remember to take special care around each joint or node, as this is where you are most likely to lose significant amounts of fiber.
Processing: Buffing
Buffing is process of further refining the material so that you remove more of the woody splinter-like bits out of the fibers. If the material is dry, you can often buff by rubbing the strands of fiber vigorously between your hands.
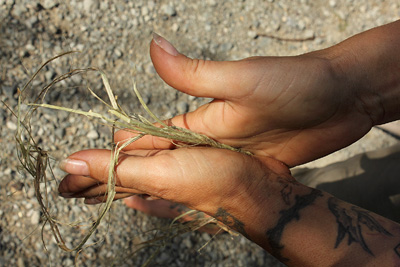
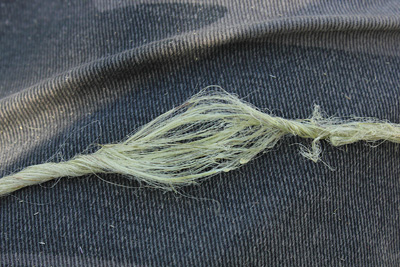
With some consistent buffing, the fibers should start to separate, appear more fluffy. Notice how smooth and waxy these fibers still look at this stage.
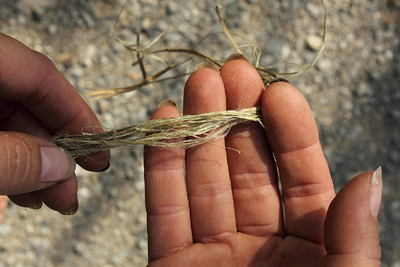
With continued buffing, the fibers will look less and less waxy and more fluffy. They will even get paler in cooler as you continue to work them between your hands. Notice the fluffiness of the fibers in the photo below.
This is at a stage where it would be easily worked into cordage.
If you look really close you can observe there are still a few small slivers of woody materials among the fibers. These can be removed with further buffing.
Once you have reached a satisfactory level of buffing, you can now reverse wrap your cordage. You can certainly choose not to take your materials this far, and make some “quickie” cordage. Though, this will no doubt be less durable and more likely to fail you under pressure.
Reverse Wrap Technique
One way to start this cordage making technique is by taking the prepared fibers in both hands, a few inches apart. Then, twisting your hands while they are a few inches apart, moving in opposite directions till a loop or kink forms in the material. See the photo for an example.
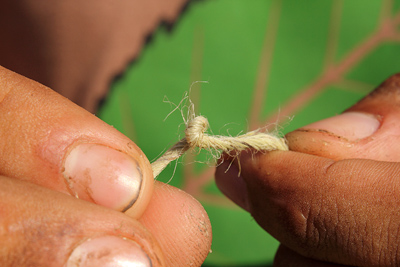
From here, you need to pinch the loop or kink you just made and hold it firmly. You can do this with 2 fingers of one hand, or you can hold it in your teeth. We will demonstrate the mouth holding method here, but feel free to experiment with what works best for you. See the photo below for the mouth holding method.

Assuming you are holding it in your teeth, you need to grasp the two lengths of the fibers so that there is one in each hand. With two fingers on each hand, twist the fibers in the same direction so that it continue to put tightening pressure on the kink between your teeth.
Once you have twisted, you can then wrap. Meaning, you take the two lengths of fiber you just twisted and you wrap them around each other. It is important that you do so in the opposite direction you just twisted. The idea behind this is that the tension of the twisting pushes in a direction when it is wrapped that keeps the two lengths of fiber together. They are pushing against each other which keeps them from unraveling.
If you end up twisting and wrapping the same direction, your cordage will keep unraveling. This is the key to reverse wrapping.
As you continue down the length of your fiber you should get a nice, even coil forming. The important thing to remember if you want a consistent tightness is to maintain an even pressure of tightness as you wrap down the fiber.
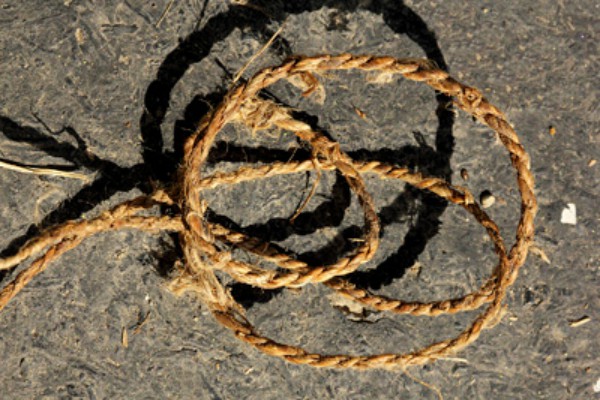
With practice, your cordage will come out looking very nice and tight. Try making cordage and enjoy your practice!

source : Filip Tkaczyk