


Fire pit construction is an important skill that varies quite a bit depending on your needs. I’ll focus on an impromptu fire pit that I would use to stay warm in an overnight survival situation.
Humans have probably been making fires for somewhere around 600,000 years! It’s one of the skills that defines us as a species. Creative problem solving is one of the primary skills necessary for success in the backcountry and fire pit construction is no different.
Before we begin a discussion about fire pit construction I’d like to mention a few things about why we are building a fire in the first place and what the fire should be doing for us. Intention precedes technique. Fire can be used for an almost infinite number of purposes in the backcountry, including cooking, drying clothing, purifying drinking water, or making tools. The fire we will discuss here is meant to keep us warm in a survival emergency, without a tent or sleeping bag.

If weather conditions are in any way inclement it’s important to realize that we’re going to want a relatively large fire. Small fires are fine for roasting hotdogs on a summer evening, but they aren’t going to cut it to sleep next to in the cold. This is a fairly common misconception, and many folks in the survival community like to make very small fires. One of the reasons for this is the belief that a large fire is unnecessarily consumptive of fuel resources. While it is obviously true that a larger fire requires more fuel, a small fire is more difficult to maintain.
Larger fires can burn on their own for an hour or more without adjustment, but small fires require constant attention to maintain. This means you’re probably going to spend all night just keeping it going while not getting any sleep. Small fires also require higher quality fuel. While a large fire can be fed with wet or even green wood, smaller fires tend to peter out when fed low quality fuel. Bulk firewood is relatively easy to harvest. Wood is abundant in the forest. You will probably spend the same amount of time harvesting a lot of lower quality, larger diameter firewood as you would selectively harvesting higher quality, smaller diameter wood.
Next we should explore some considerations in regard to site selection. Unless you are in a dire situation you should always be extremely mindful of local fire conditions. If risk of wildfire is high, you should consider having your fire on a river bank, stone surface, or not at all. Most wildfires in the United States and Canada are started by carelessness, and practicing skills is no excuse. Even under moderate fire conditions, you should be mindful to keep your fire away from forest duff, peat, and roots, all of which can smolder for impressively long periods of time before finding the opportunity to flare up and start a forest fire. Also be aware of what is above the fire. You don’t want flames running up the dead lower branches of a tree for example.
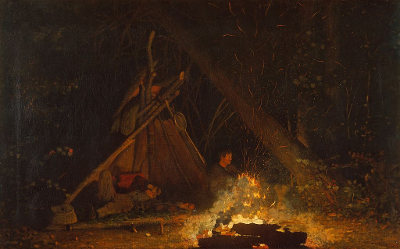
I’m usually looking for an area which is already sheltered naturally, such as a dry spot under a tree or a rock overhang, where I can get out of the elements. If possible I like to have some sort of backdrop behind me, be that an improvised shelter, a rock wall, or even just a tree or log. Remember this fire is meant to keep us warm, so we want to help it do its job effectively. I’ll generally give myself 3-5 feet in between my bed and my fire depending on conditions.
Start by clearing away any duff and rootlets. You want to clear the forest floor down to the level of mineral soil, but you shouldn’t have to dig a hole. It’s pretty common for folks to want to dig an actual pit, but having the fire below surface level reduces the radiant heat and makes the fire more apt to struggle with oxygen deprivation.
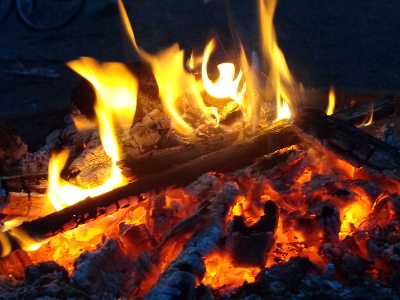
For this fire pit we’re going to use some rocks. Rocks are popular, but not critical in fire pit construction. The advantage is that they can be utilized to absorb, reflect, and reradiate heat, while also keeping the coal bed consolidated. Heat storage is the primary reason I like to use rocks if they are available. Remember to be careful of wet rocks. Rocks that have been submerged can explode if heated quickly.
We’re going to create two parallel rows of rocks about 1 ½-2 feet apart, and ideally 4-6 feet long. The back row will be made of the largest rocks we can gather and act to contain the coal bed and reflect some amount of heat.
The front row will be made of smaller rocks. Fist-size rocks are ideal, but whatever we can find will work. These rocks will also help to contain the coal bed and prevent it from drifting towards our sleeping spot, but are small enough rocks as to not block radiant heat from the fire. I also use these smaller rocks like heating pads and hand warmers, rotating them out throughout the night so I always have a few warm rocks tucked around me.
I prefer to use a parallel fire lay and cut my fuel (dead branches) into 4-6 foot segments. If I’m not able to cut fuel, I just gather the longest pieces I can and feed them in from either side. Keeping your firewood long saves work, and a long fire heats your entire body. Extra fuel can be stored behind the larger back wall to create an even larger reflector that also helps dry out the wood a bit before going on the fire.
This long fire lay style is one of my favorite methods of fire pit construction, and one that I use relatively often if I have the time and rocks. Even simpler would be to just scrape away the duff and build a parallel fire with no rocks at all. This is what I will typically do if pressed for time.

Fire pit construction is an inherently simple process. There are a lot of right ways to do it depending on your needs, and over time, as you build and use a lot of fires you will develop your own personal tastes and style. Try my recommendations here, utilize any other resources you have available to you, and always be open to experimentation and reflection!
source : Jedidiah Forsyth