


Do you want to try your hand at some home cheese making but don’t know where to start? You’re in luck!
Whether you’re homesteading out in the country or city living in an apartment, cheese making is a valuable skill to have and will help you create delicious, healthy food!
It’s also a skill set that increases your capacity for self-sufficiency and sustainable permaculture lifestyles. Home cheese making is easy and with some basic knowledge and minimal equipment you’ll be started in no time!

Cheese 101
So what is cheese? Simply put, cheese is a preserved form of milk. The ability to turn milk into a compact, portable, nutritious, and variably shelf stable food item is a marvelous thing.
During the home cheese making process the fats (butterfat) and proteins (casein) in the milk are coagulated, drained, and often salted. Coagulation of the proteins to make “curds” is done by rennet.
Rennet is a group of enzymes present in the stomachs of ruminant animals (animal rennet) and certain plants (vegetable rennet).
Cultured and Acid Cheese
With home cheese making, there are two basic types that you can make. Let’s take a brief look at both.
1. Cultured Cheese
When making a cultured cheese, certain bacteria strains (known as cultures) are used to ripen the milk and then the rennet curdles it. These cultures are normally freeze dried and purchased in packets for cheese making.
Different cultures are used for making different specific cheeses but what particular culture you use is not very important when you are just starting out. You will still end up making a tasty cheese. What is important, however, is whether the bacteria are mesophilic or thermophilic. This has to do with the temperatures at which the bacteria work.
Mesophilic Cultures:
The bacteria in a mesophilic culture will reproduce best in temperatures from 80-90F and will be destroyed when exposed to temperatures above 100F. Mesophilic cultures are used in many fresh cheese recipes in addition to cheeses such as cheddar, feta, chevre, and colby. Mesophilic cultures are what the beginning cheese maker will use most often.
Thermophilic Cultures:
The bacteria in a thermophilic culture propagate in similar temperatures as a mesophilic culture but can withstand much higher temperatures. Cheeses such as traditional mozzarella, provolone, parmesan, and swiss all use thermophilic cultures.
2. Acid Cheese
When fresh, raw unpasteurized milk is left to its own devices and not put in the fridge, an interesting event takes place. The naturally present bacteria begin feeding on the milk sugars (lactose) and produce lactic acid. As milk becomes more acidic, it begins to curdle, even without rennet. This is a process known as clabbering and the curdled milk is very edible. There are many recipes that use vinegars and citrus juices to lower the milk PH instead of letting the bacteria do its thing. These are known as acid cheeses.
In contrast, when milk is pasteurized, those beneficial, lactic acid producing bacteria are destroyed. If you’ve never had a sour milk experience I encourage you to go ahead and leave some pasteurized milk on the counter for a couple days and then take a big ole whiff! When the original bacteria are destroyed, other bacteria are able to colonize and essentially putrefy the milk.
Ready for home cheese making? Try some of these recipes:
Any kind of milk can be used in these recipes whether it is cow, goat, sheep, etc.
These recipes can be adjusted for smaller volumes of milk, however using at least one gallon will usually yield around one pound or more of cheese depending on the recipe and the milk used.
Clabber Cheese:
Clabber cheese is not the fastest but is by far the simplest cheese you can make. You don’t even need a stovetop!
It makes a very tangy soft cheese that is great on toast, salads, and is a delightful alternative to ricotta cheese in lasagna, stuffed shells, and other cheese stuffed Italian dishes.
I recommend trying a small, one quart batch to see if you enjoy the taste as this cheese is particularly tangy.
Here’s how to do it:
-Take one quart of fresh raw, unpasteurized milk and pour it into a glass quart jar (so you can monitor it)
-Take off the lid and cover with a towel or coffee filter secured with a rubber band and set on the counter away from direct sunlight.
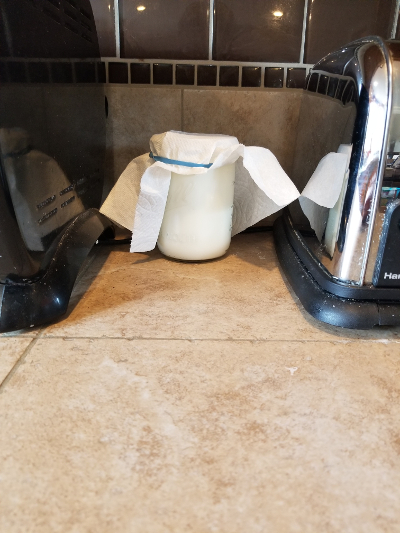
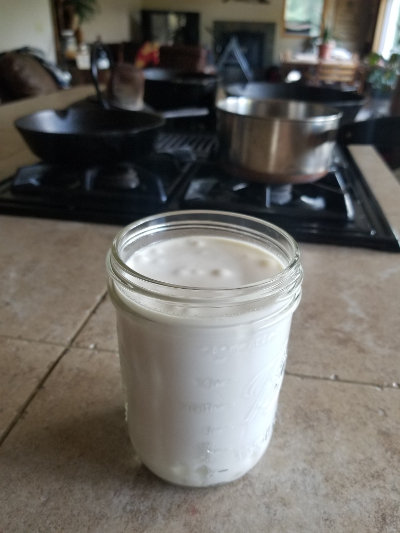
-Let this sit until the native bacteria have curdled the milk and there is a clear separation between the curds and whey. This will normally take around two days.
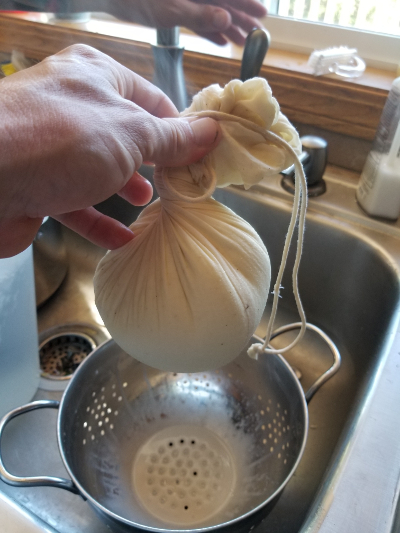
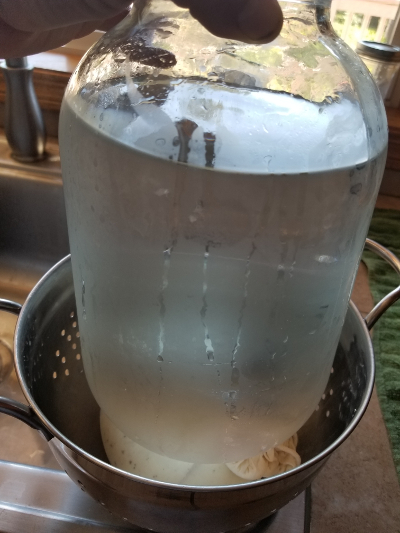
-Pour the jar off into a colander lined with doubled up cheesecloth or a jelly “nut-milk” bag to collect all of the curds. Hang to drain until there is no more dripping. This can take a full day.
-Add 2 teaspoons of salt and mix in well.
-Store in an airtight container for up to a week or freeze for later use.
Farm Cheese:
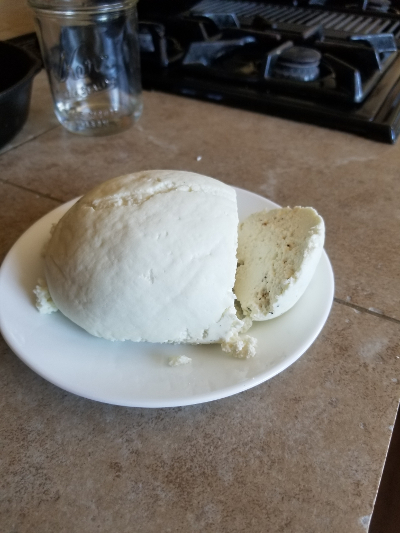
Farm cheese is one of my personal favorites for home cheese making. It is my go-to cheese to make when I have a fridge full of milk to get through fast or if I’m just feeling too impatient to wait for a cultured cheese like Chevre to do its cheesy thing.
Farm cheese is the basis for some common cheeses and depending on the acid used and amount of whey drained you can produce cheeses such as Paneer, Queso Fresco, and fresh curd ricotta.
Crumble or slice up farm cheese for salads or sandwiches, even toss a nice slab on the grill to barbecue. Farm cheese won’t melt!
Here’s how to do it:
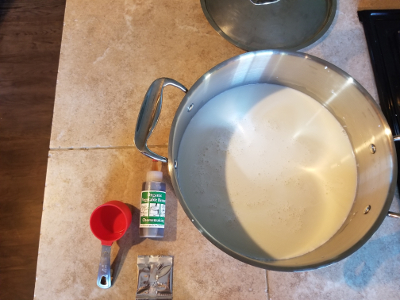
Gather your materials:
- One gallon of milk (raw or pasteurized)
- Stainless steel pot
- ¼ cup of acidic liquid (lime juice and a tad of apple cider vinegar in this case)
- Two teaspoons of salt
- Cheesecloth or jelly bag
- Colander
- Large slotted spoon for mixing and ladling.
-Pour the milk into the stainless steel pot and put on the stovetop, uncovered, over high heat. The goal here is to bring the milk to just about boiling (around 180 degrees) without scorching the milk so be sure to constantly stir until you start seeing a “skin” forming on top of the milk. At this point, take it off the heat.
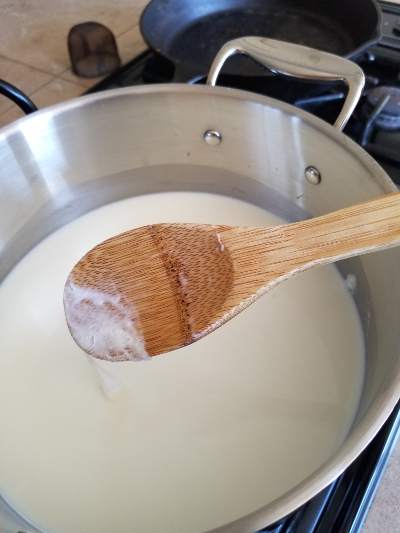
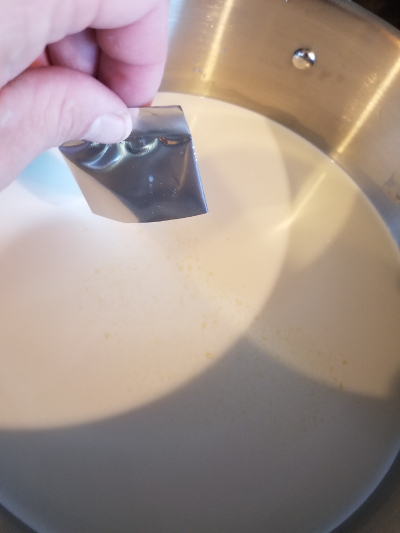
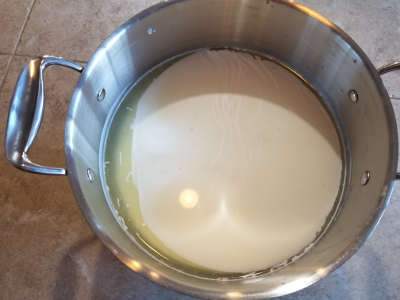
-Slowly add the vinegar while gently stirring. Continue stirring until you see the curds separating from the whey. It usually only takes a moment for this to happen and for those who have never seen it, it looks like a magical event just took place in your pot! Let this sit for about ten minutes.
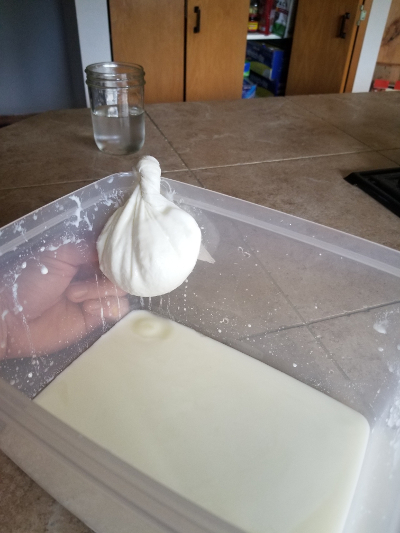
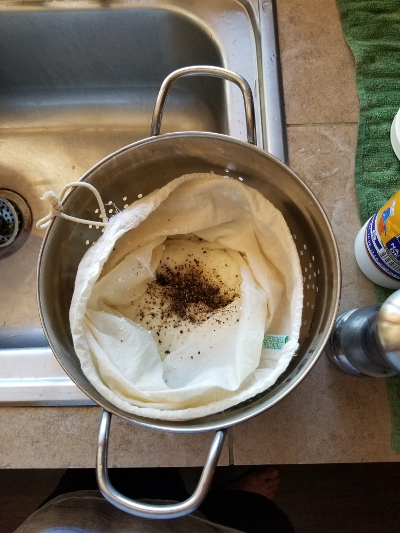
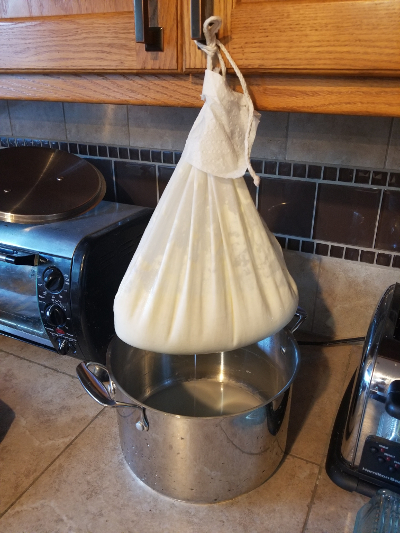
-Line the colander with cheesecloth or a jelly bag and pour the curds and whey in. At this point you can add the salt and any other spices. Mix thoroughly.
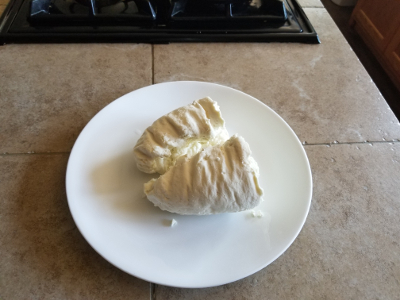
-Drip drain for a softer, more ricotta like cheese or press out the moisture for a hard, slice-able cheese.
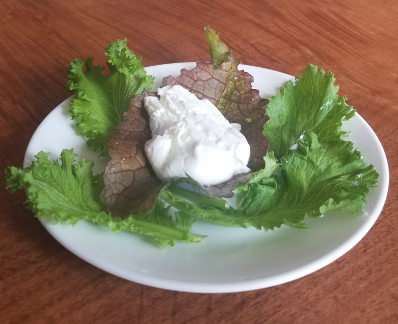
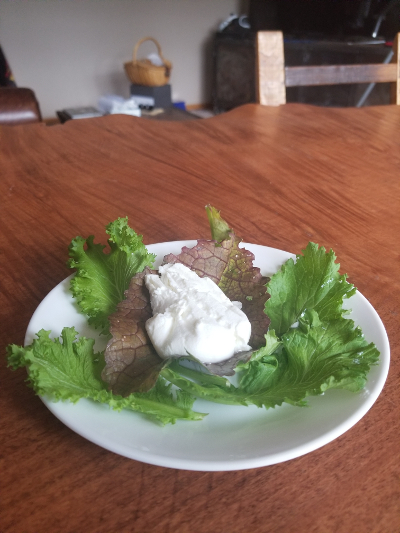
Drip-draining to make a soft cheese .
Pressing out moisture for a harder, slice-able cheese .
Chevre:
Chevre means “goat cheese” in French. Purists may thumb their nose but even if I’m using cow milk I call it chevre when I use this recipe.
Chevre is a great introduction to cultured home cheese making and has a mild taste that lends itself well to being flavored in any way you like. I’ve mixed everything from blackberry jam to old bay seasoning into this cheese and haven’t found a combo that tasted bad yet. (Except for the batch I tried a couple years ago with some Dijon mustard, that one was weird!).
Here’s how to do it:
Gather your materials
- One gallon of milk (raw or pasteurized)
- Stainless steel pot
- One packet of mesophilic culture
- Cheese cloth or jelly bag
- Colander
- Large slotted spoon for mixing and ladling
- Two teaspoons of salt
- Four drops of rennet diluted in ¼ cup of cool water
-Pour milk into the stainless steel pot and put on the stovetop, uncovered, over low heat. Heat the milk up to about 86 degrees Fahrenheit and then cut off the burner.
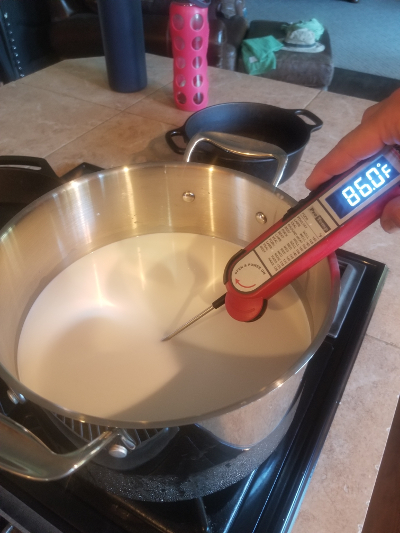
-Pour the mesophilic culture onto the milk and let rehydrate for 5 minutes.
-Mix the culture into the milk using an up and down motion disturbing the surface of the milk as little as possible. Let the milk ripen for about 30 minutes.
-Pour the diluted rennet into milk and incorporate using the up and down motion for 30 seconds to ensure thorough mixing.

-Cover the pot with a towel and set on the counter at room temperature overnight or about 12 hours until there is a clear separation between the curd and whey.
-Carefully use the slotted spoon to ladle curds into a colander lined with cheese cloth or a jelly bag. At this point mix in the two teaspoons of salt and any other seasoning you want to try. Hang the cheese and drip drain overnight or use a cheese press to expedite the process.
-Store in an airtight container or freeze for later use.
Have fun with your home cheese making!
Home-made cheese is just one of many benefits to raising animals on your backyard farm or permaculture homestead. From a permaculture perspective of “stacking functions”, some animals are heavy hitters. I have been working with goats for years now and their milk makes some tasty cheese.
If you let a jar of milk settle in the fridge overnight you can collect the cream on top and save up enough to make some goat butter. Meat, tanned hides, manure, invasive blackberry control, and much entertainment are some of the other perks to incorporating goats into a permaculture food production system. Happy home cheese making!

source : Ben Mardis