
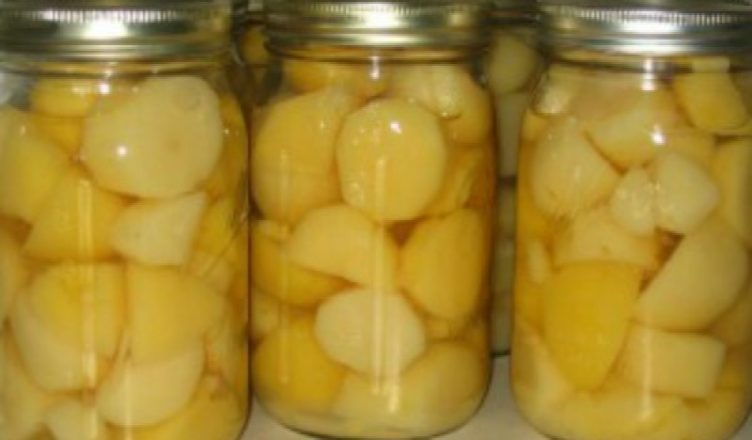


Canning potatoes is my favorite method of preserving them for the following year. They taste amazing (much better than store bought canned potatoes), and they’re really convenient to heat and eat.
You can use this method with homegrown or store-bought potatoes, it really doesn’t matter. I’m kinda spoiled by our garden potatoes though, so that’s definitely my preference. Nothing beats a freshly dug Yukon Gold. Mmmmmm…
We enjoy canned potatoes heated in a saucepan, seasoned with a little salt and pepper and tossed in butter. They’re also fantastic for making mashed potatoes, potato salad, and soups, since they’re already thoroughly cooked and require no additional prep work.
 Canned potatoes will stay good for years, though I’ve found that over longer periods of storage the texture becomes unappetizing. We try to use up our canned potatoes before a year’s time. By then we already have another crop coming in and ready to harvest, so we never run out of potatoes.
The next time you find yourself with an abundance of these delicious tubers, try canning them!
Editors Note: If you’re counting on canning to help your family meet its food needs in a crisis, when electricity may not be available, and would like some ideas on Canning Without Electricity or Propane, check out my recent video on Off Grid Canning.
Here’s how to can potatoes the easy way…
Equipment:
- Pressure canner
- Wide mouth canning jars and 2-pc lids
- Canning tools (wide mouth funnel, jar lifter, lid lifter/tongs)
- Large slotted spoon
- Ladle
Ingredients:
- 2-3 lbs potatoes per quart
- Canning salt
- Water
Method:
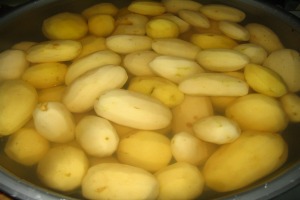
Prepare potatoes for canning by washing and peeling them first. New potatoes can be scrubbed with a stiff brush without peeling. Keep a large bowl of cold water nearby to submerge your peeled potatoes in as you work, to keep them from turning brown.
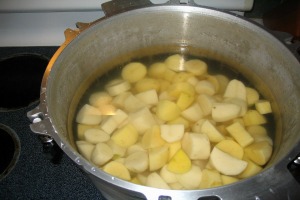
Cube the potatoes, and add them to a large pot. Cover the potatoes with water and boil for 10 minutes.
Drain the potatoes. I use a large slotted spoon to scoop the potatoes out of the hot water since the pot I’m using is usually too heavy to lift and pour out.
Meanwhile, get a small pot of hot water simmering, and allow your canning lids to simmer (not boil) for 10 minutes. Keep them hot.
Also, fill a large pot with water and bring to a boil.
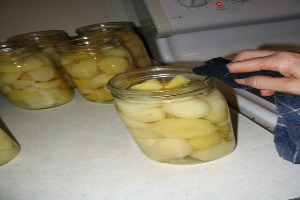
Fill hot, sterilized jars with the hot potatoes, leaving 1″ headspace. (“Headspace” is the space between the food and the rim of the jar.)
Add 1 tsp. canning salt (or Kosher salt) to quart jars, if desired. This has nothing to do with preservation, it’s only for flavoring. If canning in pint jars, add 1/2 tsp salt. Don’t use table salt (iodized) or it might discolor your food.
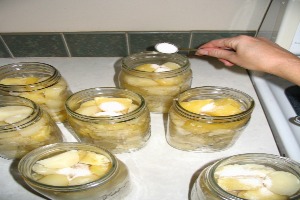
Ladle boiling water into jars, leaving 1″ headspace.
Use a plastic or wooden utensil (not metal) to poke around in the jars to remove air bubbles. Add more water as necessary to maintain 1″ headspace.
Use a wet cloth to wipe the rims clean, being sure to remove any food or salt particles which would prevent the lid from sealing. (Remember, even the tiniest chip or crack in the rim of a jar can cause seal failure, so it’s important to check your rims before filling the jars.)
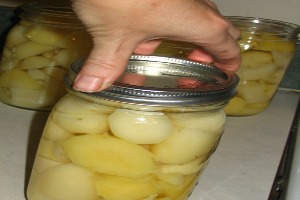
Place hot, previously simmered lids on filled jars.
Screw the ring down finger-tight. If using Tattler reusable lids you’ll want to follow their directions accordingly.
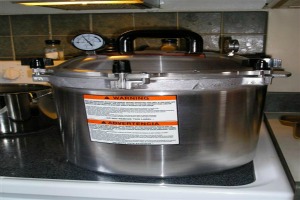
Place filled jars in the pressure canner. If you’re using an All American brand pressure canner, the rack should be in the bottom of the canner along with 2″ water (which will obviously rise as you load the canner with jars). Be sure to consult your canner’s instructions if you are unsure of how much water to use.
Important: You absolutely MUST use a pressure canner for canning potatoes (and any other low acid foods, ie: vegetables and meats). Canning potatoes in a water bath canner risks poisoning your family with botulism. Taking short cuts isn’t worth your life or the life of a loved one. Invest in a good pressure canner, and it’ll last for generations.
Place the lid on the canner, tighten it down, and turn the heat up to med-high. Once the canner begins to steam, allow it to vent for 10 min. Then place the regulator weight on the vent cap, and watch the pressure rise to 10 lbs. Start your time.
Process pints for 35 min., quarts for 40 min. at 10 lbs pressure. (If you live above 1000 ft. you’ll want to can at 15 lbs. pressure.)
Adjust your heat accordingly to maintain the correct pressure. I usually turn mine down to medium heat for the remainder of the session.
 When the canning process is complete, turn the heat off and allow the canner’s pressure to drop back down to zero before removing the regulator weight and unscrewing the lid. Allow the jars to sit in the canner for an additional 10 minutes before removing, to reduce siphoning. Always be sure to take the lid off away from your face, as very hot steam will be escaping.
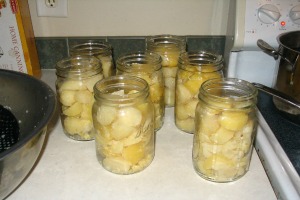
Using a jar lifter tool, remove the jars from the canner and place them on a cooling rack or towel for 24 hours before testing the seals. To test the seals, remove the ring from the lid and pull up on the metal lid with your fingers. It should not come off. If it does, the lid has not sealed and you’ll need to put that jar in the fridge to be eaten in the next few days.
Storage
Store home canned goods in a cool place away from direct sunlight for best quality. It is best to consume home canned goods within a year for highest nutritional value, but they can be safely stored for many years- although taste, texture, and nutrients will diminish over time.
Potatoes are naturally starchy, so over time you will notice that the liquid in the jars will turn cloudy or even white. This is normal. Also, if any of the potatoes are poking up above the liquid in the jar, you may notice that they’ll turn brown over time. This is okay, but isn’t very appetizing. I usually discard those parts, just for appearances.
You’re going to love your home canned potatoes!
by Kendra Lynne