


NOTE: This is a post written by Anthony and Kelly Braun.
After attending Creek’s Survival 101 course and a talk from him about Every Day Carry (EDC) I began looking at my EDC. I wasn’t carrying much survival gear as my EDC, so I began investigating mini survival kits. I wanted to find something that I didn’t have to remember to grab every day and something unobtrusive that didn’t take up a lot of bulk in my pocket. The typical mint tin version was out. I wanted to create an EDC mini survival kit that I would easily remember and would not take up too much space. I had been making paracord bracelets for 6 months prior to taking Creek’s courses and found one particularly useful weave called the Ladder Rack or Trilobite. (Here is the video link to making the bracelet that I used.) A nice feature of this weave is that it has approx 2 feet of paracord per inch of bracelet. (The standard Cobra Knot has about 1 foot of cord per inch of bracelet.) Looking at that weave I envisioned trapping items inside the cavity of the weave for safe keeping. In order to accommodate everything I wanted, I realized I would need a longer area than a bracelet, so I thought; why not make it a belt? I wear one daily anyway, it doesn’t take up space in my pockets, and by making it this way no one would suspect I have an EDC survival kit with supplies to do many things.

Initial Thoughts
There are some drawbacks to this project, the first one being the belt sizing. It is not adjustable, so once it’s made significant weight gain or loss will cause you to have to make another belt. Second, it’s not quick-release to access supplies or use the paracord, as it takes some time to unweave the belt. (My first attempt took me 20 minutes to unwind) Third, specific items in the belt cannot be accessed individually, one would have to unweave the belt and get access to all the items. But once the belt is unraveled, it contains quite a few supplies that would greatly aid survival if I had nothing else and was stranded– I would be far ahead of the curve, at least.
If you have not seen the ladder rack weave or made a bracelet with it, I suggest you practice before attempting the belt. Learning the pattern without trying to hold extra items inside will make the construction much easier. I modified the weave a bit by adding an extra turn of cord down the length of the belt. This added some width (and therefore more holding room for supplies), and added to the amount of paracord per inch of finished belt. Here is how I made my belt:

Supply list (and the use I foresee):
- paracord 100ft (multiple uses including shelter)
- whistle on buckle (rescue)
- 3 snack size ziploc bags (water collection/carrying, keeping tinder dry)
- condom (water carrying)
- coffee filter (water filtration)
- cotton PET ball (fire starting)
- 30 in of jute twine (fire starting tinder)
- 30in of military trip wire (snare making for food)
- safety pin (quick repairs, spare fish hook, splinter removal)
- 3 zip ties (attaching/lashing items, makeshift handcuffs)
- 4 storm proof matches with striker (fire making)
- 30 feet of fishing line with fishing hook (food)
- camping wire saw (cutting wood for fire or shelter)
- 20in of latex tubing (straw to get hard to reach water, tourniquet, slingshot for hunting)
- flexible mirror (signaling)
- 2 water purification tablets, individually wrapped
- 1 electrolyte replacement tab (dehydration prevention)
There are many ways to modify this list and customize the belt. Just remember that everything you add needs to be able to be stored in essentially a long thin tube.
The belt making process
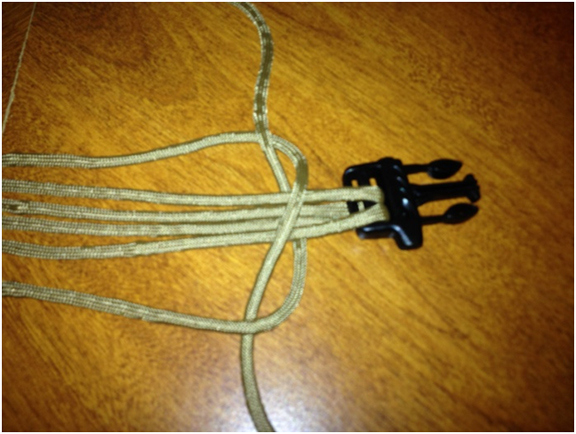
I started with 100 feet of paracord, a buckle, and all the survival gear I wanted to include. This changed throughout the process, as some items just didn’t fit and others I had to eliminate when I ran out of space. The list above is my final supply list that actually went into the belt. As I mentioned above it’s a one size belt and not adjustable; so, I started with one of my current belts and used that for measurements. I measured out the 50 ft mark in my paracord and looped a hitch knot in one end of the buckle through it (I used the female end). The other end of the buckle I laid at my belt hole that I use to buckle my regular belt and ran both ends of the paracord through it. Instead of just bringing the ends back to the female end of the buckle and starting the weave like I would for a bracelet, I threaded them through the female end one more time and brought the two ends back up to the male end to start my weave there.
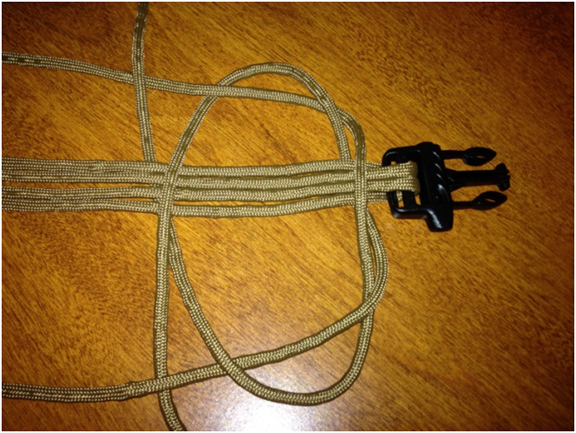
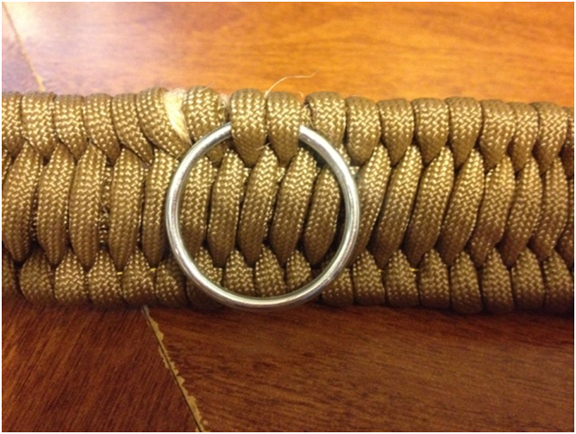
In the picture you can see there are four lines running between the 2 ends of the buckle. Then I brought the 2 loose ends back along the outside to the male end once more and started the knot to begin the weave.
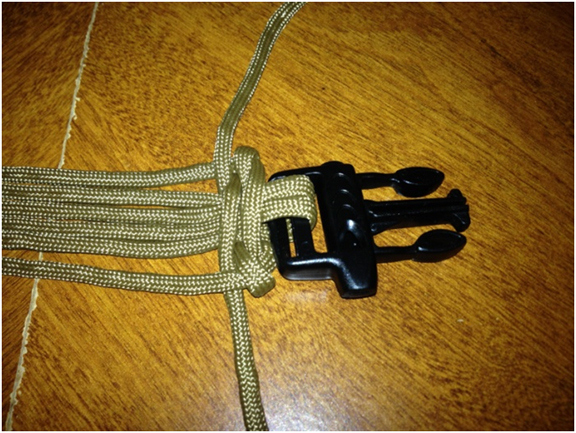
 Here is the starting knot pulled tight. If you are not careful it is easy for the length of the whole belt to change while tightening the first knot. I had to remeasure it frequently and keep tweaking it to keep the same length. Once you get a few rounds of the weave down, the length holds tight and its no longer an issue.
Also, at this point I did a few other things to make it easier to do the weave with such a large amount of cord:
First, I baled each length of cord into about 8 inch loops and secured them so I was just weaving with bundle instead of the entire length of cord (which would just knot up). For the majority of the belt there is plenty of slack and it works great. If you get to the end and have a large bale left you will need to undo it and just thread the cord as a single strand.
Then I also took some tape and secured the four inner cords just to keep them lined up so they didn’t become twisted during the weaving process.
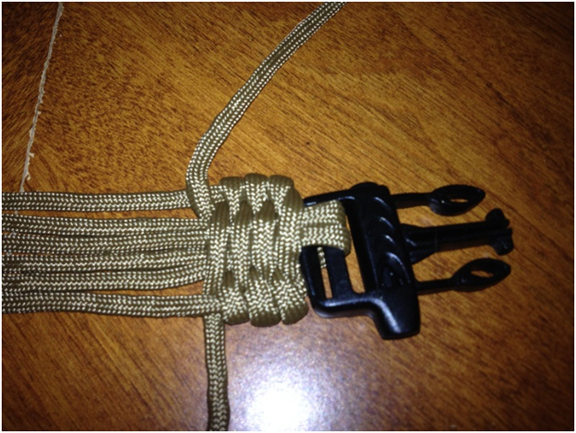
Then the final thing I did to help identify the lines and keep them straight (but also to secure materials for the kit) was to wrap the jute around one of the outer cords. I secured this with an overhand knot at each end and wrapped the snare wire around the other side.
Here are the items ready to start weaving the in the belt. I wrapped each stormproof match in aluminum foil then secured that to the camp saw. I did the same for the fishing line. I did this to keep the small items from moving around and possibly falling out of the belt (or stabbing me in the back) and also to cover the saw so it didn’t wear through the paracord wrapped around it. I stored the condom in one of the ziploc bags rolling it lengthwise. I also folded and secured the coffee filter in another ziploc bag, and the PET cotton ball in a third. I took each one of the zip ties and rolled one of the ziploc bags around it.
Basically I just laid the items on top of the 4 strands of the cord through the middle of the belt and wove around it. I had to overlap some of the items lengthwise so they fit but I tried to even everything out so it didn’t make the belt too stiff in some parts and flimsy in others.
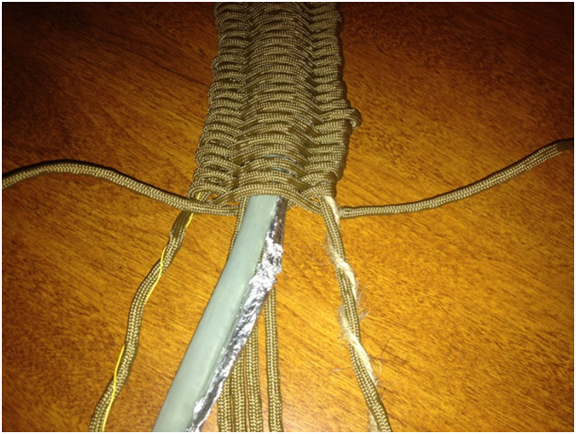
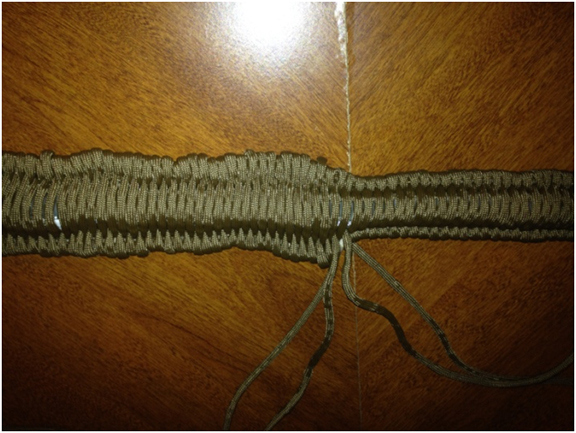
Above is the belt in process. I didn’t worry too much about getting everything tight and even at the beginning. I just wove the belt so everything was trapped in it then afterwards went back through and tightened everything up starting at the far end working down toward the end where the unsecured lines were. I tightened 2 rows at a time so it was easier to keep track of which part I needed to pull on next to tighten.
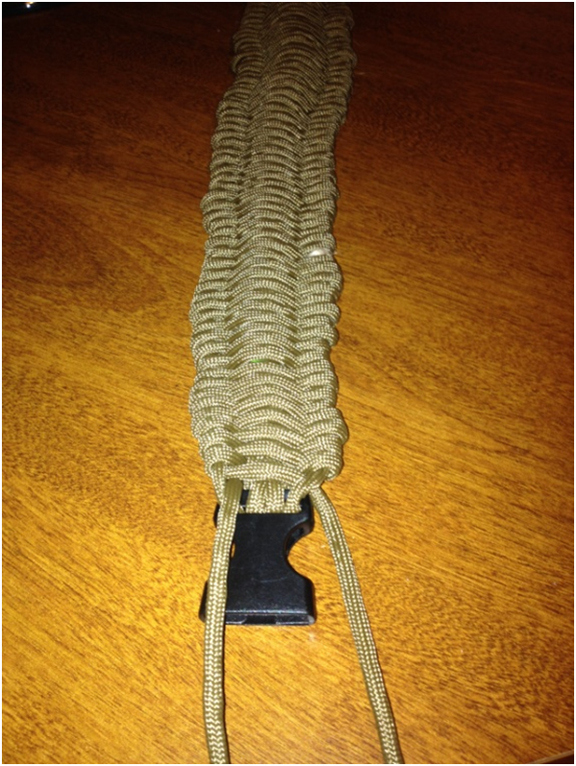
The initially completed belt is seen above. Then below is the belt in process of it being pulled tight. As you can see there was significant slop in the initially completed belt. I only had about one foot of cord left when I first finished. After tightening the entire belt I ended up with about 9 feet extra on each piece. All that is left is to finish the belt by your preferred finishing method– either by cutting off and melting the ends or using fibs to tuck a length of cord back into a half dozen or so weaves.
Here is the finished product.
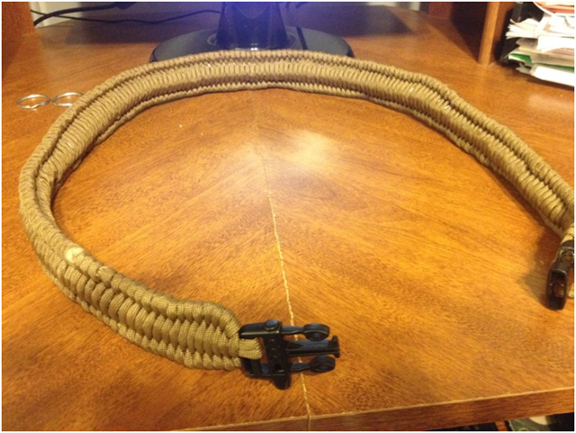
One final piece I added was the 2 metal key rings that came with the camp saw about 6 inches from either end. That places them right about where my hands fall. I use them for clipping carabiners and carrying additional items.
Final thoughts/ Re-evaluation
The belt did end up being a little tight around my waist, as I forgot to take into account how thick the tubing (along with everything else layered in there) would end up. When I make my next one, I will probably try to add a half inch to the initial length of the belt. The other thing I was considering was using a flat rubber tourniquet in place of the tubing. I would then lose the straw capabilities but would decrease the belt’s bulk significantly. Another thing that could possibly be used would be flat surgical tubing (sometimes called a Penrose drain). This could be used for the straw purpose but would be kind of like sucking the end of a freezer pop. But this would make a good tourniquet and slingshot. Also, I put all the items on what would be the inside of the belt but some of the aluminum foil shifted and ended up on the front surface, and it is now somewhat visible. This is not a huge problem but it brings attention to the fact that this is not just a belt but something more. I would like to deaden the reflection somehow. Another area to change might be the buckle itself. I have seen different belt buckles for sale that have had a small compartment to store items (the water tabs?) or one that has a compass on it. I happened to have whistle buckles around so I used one of them.

So, what do you think? Feel free to comment on ways to improve or other ideas this might spark for you.
Creek’s Additional Comments
First, that is amazing that you guys were able to get those supplies (and paracord) into a compact, nondescript belt. That is a full blown survival kit! I love it when people push the limits of creativity when it comes to carrying basic survival supplies on their person. History reports time and time again (almost every week) that victims of sudden and unexpected survival scenarios could dramatically benefit from very simple survival supplies like the ones you’ve included in this EDC belt. I wear a belt every single day and it’s the perfect clothing item to modify in such a way. After reading this post, I’m only left with one question: WHEN CAN I BUY ONE?????
NOTE: This is a post written by Anthony and Kelly Braun.
source : Creek Stewart
Like that idea about using the para cord though about making one but not sure about the size good stuff to think about though think I will try to make some bracelets first