


Every year we plant kale in both our greenhouse and our garden. We choose red Russian kale because it is cold hearty and grows fast! We eat it in a salad every night during the summer and when it starts to cool off, we save it!

Kale is great for us because it can withstand a pretty decent frost before it starts to go limp and die off. I cut our kale on November 20 from outside and the greenhouse and it was still crisp. We don’t like food, especially nutrition-packed greens, to go to waste, so we can do everything we can. It’s surprisingly easy and really good!
Red Russian Kale – A Powerful Punch of Protein and Antioxidants
First, we can kale for two reasons, one because we love it and two because we can! But kale is great for you and if your kids grow up eating it, they won’t have an aversion to it when it’s in a salad. In fact, it’s often called a “superfood” and it’s incredibly easy to grow even in cooler climates. A single serving (one cup) contains more than a day’s worth of vitamin A requirement, which is important for eye health and immune function. It is also full of vitamins K, C, and B6 as well as manganese, copper, calcium, and magnesium. A can of cooked kale has a mere 32 calories, 2.2g of dietary fiber, 2.3g of protein, 2.55mg of iron, and 198.90 mg of calcium.
How To Pressure Can Kale
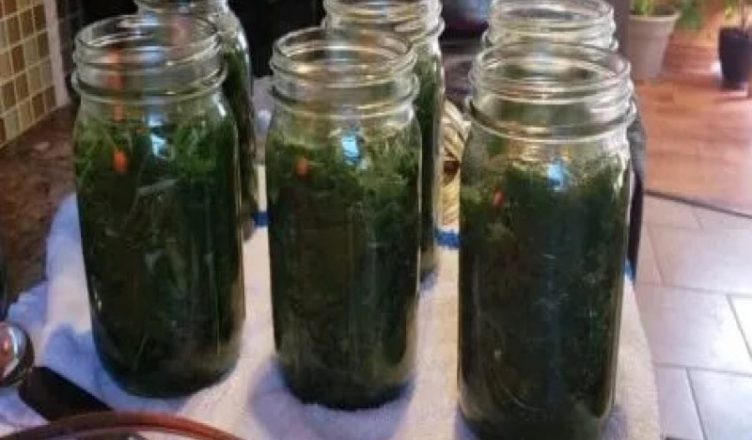
We use a pressure canner because we have one. Plus, kale is canned easily in just water, you want to sustain a high temperature for a long enough period of time. All you need is your kale, water, and salt. We did not weigh out how much fresh kale we had, but it was enough to fit packed tightly into a grocery bag. We ended up with seven quart-sized jars of kale, and it cooks down!
We do not wash the kale first, but if you want to, it won’t hurt anything. You’ll want to pull the leaves off the stems, or ribs and rip the larger pieces in half or quarters. Once that’s done, you should wash the kale in cool water. Next, blanch the kale. We used a large saucepan, but you can blanch however it is best for you! We only blanched the kale for 3 minutes before removing it and putting it into quart jars. Next, you will want a tablespoon of salt in each jar. Then fill the jars leaving one inch of headspace with water. We used the leftover water from blanching and topped everything else off with water from our well.
Then you will need to figure out what pressure is best for dark greens based on your altitude. Pressure canners come with a guidebook to help you figure it out. We are at 6800 feet of elevation, so we canned the kale at 14 lbs of pressure for 70 minutes. All seven jars fit in the pressure canner!

That’s it! Once you’ve canned kale, put it in a soup! One of my favorite ways to use anything we can is in soups or sauces. I like to use a whole can of pressured canned elk meat and a can of kale to start my stew. I also add a leek, full-fat coconut milk (to make it creamy), some jalapenos, and a bit of garlic and onion powder (to cut down the coconut flavor.)
You could add beans or carrots or onions or any other vegetable you like! I toss everything in a crockpot and let it all simmer for several hours. Then once dinner rolls around, you have a hearty meal from an animal you harvest and vegetables you preserved to store for winter. It’s cozy and comforting and nothing beats that on a cold winter night!
source : Sara Tipton