


How to Survive in America’s Mountains
When Governments Fall … Survivors Rise
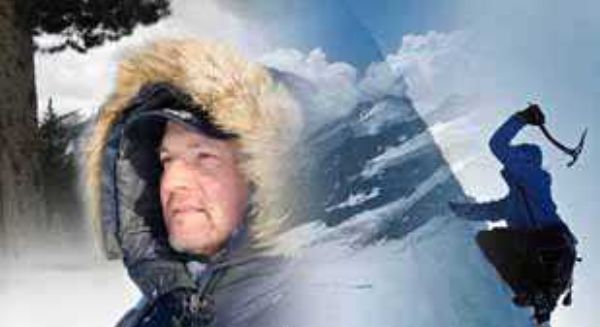
For the inexperienced, surviving in the mountains is a killer. Add snow and cold temperatures and you have a sure recipe for disaster. Like the American mountain man from past centuries, learn what it takes to live and survive in a snow-capped mountain range.
 Bad weather can appear in many mountain ranges seemingly at any time, impassable cliffs mean there’s no way forward, and the lack of the proper gear can mean you die where you slept that first night out, when the late night cold takes its toll. Ice and snow can give way beneath your feet (if you’re not paying attention); and even if there’s wildlife around, you may never find it, not without some knowledge of the land before hand.You’re embarking on a modern day quest. It’s a task that’s best to spend extra time and effort on in preparation. You need the right gear, the right maps, and you need some practice.
The fact is, depending on the size of the mountain range, and the prevalence of winter storms, it may take weeks, not just days to make a successful passage.
Warning: Avalanche may be a constant threat. Make it a priority to understand avalanche conditions and how to choose the safest route through a mountain range. If you’re crossing over glaciers, these can also present several dangerous hazards, and you should learn what these hazards are, and how to avoid them.
Crossing Through the Mountains
There are a couple reasons you may find yourself surviving in the mountains. Number one is you’re simply lost, or your car or truck has crashed off an embankment, and somehow you survived, but you’re down at the bottom of a snowy cliff. Now you just need to survive through the night until you can find a route back up to the road a few hundred feed above.Or then there’s this …
You’re alive following a collapse of modern day America, a time we’ve talked about a lot on this site in recent months. Because the threat of a collapse happening in our lifetimes is very real. In this scenario, the U.S. government has collapsed and many communities are no longer safe to live in. Perhaps you’ve had to flee in the direction of the mountains, to escape an area of the country that has suffered a nuclear, chemical, or biological attack; or worse, an actual invasion.
It could happen.
If the roads are out, and disaster is so widespread that you have no choice but to flee over the nearest mountain range, you’re going to have a hard road ahead of you.
Especially if you make the crossing during the winter, when the mountains are covered in snow. For the unprepared, the mountains in winter can quickly cost you your life, just a day or two into your escape.
For the semi-prepared, the mountains can be cold and difficult, sometimes extremely difficult.
For trekkers properly prepared, the mountains are just an obstacle, but they are passable. Trekkers properly prepared are ready for the elements. They have a game plan for dealing with the ice, snow, and other dangers that often show up when frigid conditions meet rock formations. They have a plan for food, water, and shelter.
The Adventure Begins
Now which mountain range you end up in can dictate some of your trekking game plan, and there are certainly many snowy and cold mountain ranges one might need to traverse outside of North America. Thus, let’s get global for a second.
Tips for Traveling Over Snow: Your Footing is Important
What you have for equipment will depend on how you get into the mountains. But here’s the thing: You don’t want to end up in the mountains with only a pair of sneakers, know what I mean? Thus, one way to traverse ice and hard snow is with crampons.
Crampons
Crampons are a device with 10-12 spikes on it. They are attached to the bottom of a trekker’s boots to help with traction. Thus, when you have to move up and down treacherous hills, they work well. Of course, much like turf shoes for football players, the type of crampon one uses may change with the specific kind of frigid tundra they’re being used on.

Crampons won’t help much when the snow is softer and deeper. For such flooring, one might choose to use snowshoes or even skis, for cross country skiing. Even more specifically, if you’re not looking to climb mountains — if that can be in fact be avoided as you’re journeying through such terrain — then snowshoes will likely be a good choice for lesser slopes. That said, they can be used for more severe hills provided that the walker is practiced with them and is able to ski adeptly.
Ice Axe
An ice axe might also be required under such circumstances for traction and pull. But if one does not have training here, well, it’s not likely to go very well.

Finally, pickets, ice screws, and rope should be utilized when climbing particularly difficult mountain areas (ice axe is also helpful). Further, if you have a group traveling with you then connecting and learning true mountain climbing skills will be more than beneficial as crevasses, particularly in glacial areas, can be hard to see and require professional understanding.
Thus, the first method to true survival when traveling a frigid mountain area is to plan ahead. Learn how to mountain climb, how to use an ice axe, and how to use snowshoes in advance of an emergency. Speaking of snowshoes…
How to Build Snowshoes from Scratch
If you’re inexperienced and need to cross snowy mountains, you won’t want to climb too much. Further, you’ll need some snowshoes, particularly if it’s high and/ or soft snow.But what if for some reason you don’t have any snowshoes? You can build emergency snowshoes out of sturdy brush growing in the area or even better, breaking off some evergreen boughs that are growing on a tree. Taken fresh off a tree they are still “green” and less likely to break than dead branches you may find on the ground.
At this point, you need something to tie with; that could be anything from paracord to strong fishing line to even an extra shirt cut into strips. It could also be material from seats inside your vehicle cut into strips.
Now, with your evergreen boughs, or brush, what you need to do is envision the size of a snowshoe, and then bend it in the shape of a snowshoe, and tie the ends together so it maintains that shape. For additional support, use several thin branches, stripped of any brush, and tie them also around the exterior of each snowshoe you’re building.
With slightly bigger branches, cut to about 12 inches across, or the width of each snowshoe, tie these on as cross-braces, that will help support your weight and go under the forward front of your shoe and toward the rear of your shoe. That’s at least two cross-braces, if you’re counting. Sure, it doesn’t hurt to add a couple more.
Next, arrange the snowshoes so that the points of the brush or pine needles or limbs all point behind you. That way, as you pick up your feet, they don’t catch on the snow, and slow you down, or even break apart.
Now tie your actual shoes or boots to the center of each snowshoe you’ve built; you may need to do several ties in fact, for these branches to stay on for any real distance. Here’s one example. Here’s another example.
Avalanche Danger in the Mountains
Every year in the Alps alone, 120-150 people die in small avalanches. Thus, avalanche is a very real danger. Further, they oftentimes happen on the same kinds of slopes that skiers prefer. Other popular mountain ranges prone to avalanche danger are the Cascade Mountains in the Pacific Northwest as well as the Rocky Mountains stretching north / south through Montana, Wyoming, Colorado, and Utah.Here are some of the different kinds of avalanches to look out for.
Slab avalanche: Happens when a plate of snow breaks off of a mountain and starts sliding down. Unfortunately, if you see this kind of avalanche coming at you it means real trouble.
Hard slab avalanche: When hard-packed snow breaks off and begins hurtling downward in a cohesive slab. Because it is hard- packed, it may break off in several hard and large pieces as it falls downward.
Soft slab avalanche: Same as hard slab, but the slab breaks up more readily.
Loose snow avalanche: This type of avalanche is triggered by a small amount of moving snow that accumulates into a big slide. It is also known as a “wet slide or point release” avalanche.
How to Avoid an Avalanche
First, it would seem once again important to note that that avalanches usually happen on slopes preferred by skiers. So when traversing a long, wide open 30-45 degree slope with few trees or barriers in the way, people should be cautious. Second, of course, it’s important to note that extra weight-people, for example — can cause an avalanche. So if you see anything worrisome, including the terrain, consider taking a different route. Finally, it would seem important to note that solar radiation can trigger an avalanche. So notice how the sun is beating down on the terrain and if slush/ slabs might be available to come loose in the area.Beyond the aforementioned, trekkers are advised to have an avalanche beacon (light), probe, and shovel handy with them. A shovel will help if you’re traveling with someone else and they get covered in an avalanche. Beyond that, one should get avalanche training.
In the same breath, skiers with avalanche training make up a large percentage of avalanche fatalities. Thus, this speaks to not taking too many chances (these people are probably too confident).
Reinforcing this, it’s important to note that there is a one-in-five chance of dying if caught in an avalanche even if you have the proper equipment and training.
So avoid, avoid, avoid!
Setting Up Camp in a:
Snow cave: If you have at least four feet of strong snow, you can dig yourself a snow cave to stay in. The problem? It will probably be freezing in there. The benefit? Freezing temperatures will actually be warm compared to outside of the snow cave.Digging a snow cave, of course, requires a shovel. Thus, a shovel can help would-be frigid mountain trekkers in more than one way.
Tent: A four season tent can be great. However, the wind can sometimes make a tent a noisy place to be (constant flapping). Thus, people may choose to build walls (out of snow or brush) around it for added shelter.
Again, a shovel would help in this endeavor.
Bivy: Get in a sleeping bag and lay down for a good night! Usually, people do this in cracks in rocks or in a dug trench. This is about as basic as it gets, of course. In other words, only if you have to.
X Factors: Remote Cabins
Some mountain ranges are dotted with remote cabins; you may come across one or more that are unoccupied. In a time of collapse, the owners may be trapped in a distant city or have even perished in a disaster. For now, this cabin could be considered a temporary shelter in an emergency. Temporary because they may have survived and now be on their way to this remote cabin you’ve stumbled upon. So it’s up to you whether or not you want to move in for a period of time; but if they do show up, do the right thing and give them their cabin. Go out of your way to not eat their food, or water, or pillage any other supplies you find. These people may have children and they may have gone through a great deal of trouble to ensure their cabin was properly equipped for an emergency. Give them what’s their’s and move on if they ask you. Keep in mind, if you show nothing but courtesy and respect, they may show you the same.
Recon: Do Your Homework
The route you choose through the mountains may include following railroad tracks as well as intersecting forest service roads. Be sure you have the latest maps — there may be one or two newer forest service roads that aren’t on older maps from just a few years ago.Get to know your local mountains. Talk to experienced hunting guides and ask them where they think the best hunting would be if a person ever had to live off the land. A few might be glad to share some tips.
Talk to local forest rangers and / or national parks service. Ask what mountains and specifically which slopes poise the greatest risk of avalanche. Ask if they could recommend 2 or 3 different routes for crossing through a specific section of mountains in the dead of winter. Do any follow alongside rivers or creeks known for deer or elk?
Which routes pass over or near glaciers? What are some ways to detour and cross over a mountain pass without having to rope up (mountaineering)?
So do your recon. Make some calls and take notes.
Additional Dangers in the Mountains
Beyond a true to life avalanche, here are some other things to be concerned about:Falling rock: This one would seem obvious.
Falling ice: Look out for rock overhangs, the broken parts of glaciers, and icicles. These are dangerous areas for falling ice.
Crevasses: Noted earlier, these are deep chasms or slits in the ice (think glaciers). They are often difficult to see. Thus, testing areas carefully before stepping or climbing is a good way to go. It’s advised to avoid glacial travel all together, unless traveling with a person trained in crevasse rescue.
Altitude sickness: Rapid ascent can lead to altitude sickness. When this occurs, one should descend quickly. Further, when about to go to sleep — if you’re on a mountain and not a valley — one should descend some before settling in to sleep to avoid this.
Wildlife: Most animals (mountain lions, bears, and even wolves will hear you and choose to avoid you). If on the rare occasion you end up surprised by a mountain lion or bear — grizzlies poising the most danger, typically — items such as bear pepper spray or even a good air-horn can work as deterrents. Bears have sensitive hearing; hold down on the air-horn until it runs off. Have a firearm ready as backup. A rifle such as a .30-30 is strong enough usually to take out a bear. But do you have the presence of mind to pull your weapon, aim, and fire in time if ever charged by a bear? Be on the alert when in bear country.
When it comes to mountain lions, small children are most at risk, when there is a threat. Keep them close to your side. Children should never lag behind your group. A mountain lion may see an easy meal.

Usually wolves leave people alone. On rare occasions a wolf or even pack of wolves has been known to stalk people. With the re-introduction of wolves into both the Rockies and Cascade Mountains, wolves are poising more dangers and multiple reports (like the one below) are shedding light that the mountains in the Northwestern states are not as safe as they once were for most hikers and hunters.
Finally, Let’s Talk Cold Mountain Food
Here are some things to look for in the mountains when you get hungry. Of course, it all depends on what mountains you’re in and at what altitude. Further, you’ll want to cook a lot of this and that means fire (a hard thing to come by in the snow, unless you can get into a wooded area). Thus, getting in and out of snowy mountains is the best idea.Don’t wait around, people. Start hunting:
1. Rabbit – 1) Look for tracks in the snow signifying rabbits; 2) Set several traps in areas rabbits may be likely to pass by, using brush and even building snow banks to “funnel” rabbits in the direction of traps.
2. Deer – You may find the most chances of spotting deer (along your route) may be near areas of running water, such as streams or creeks; game animals often have routes that are either along side drainage ways and drainage basins (streams and rivers), or they follow game trails that lead to and from these streams to areas where they feed and bed down.
Where do you hunt deer? Crossing through the mountains in the winter, in the snow, you don’t have the option of easy cross country travel. You’re also not likely to find much deer at higher elevation, once winter sets in.
While you’re still in the lowlands, make it top priority to take down a large deer or elk or other big game. Harvest your kill, smoke and dry enough meat to last a few weeks, and you’ll now be ready for your trip over the mountains. Of course, if you can, wait until late spring and when the snow is gone from high elevations. But if it’s essential you make this crossing during the winter months — perhaps there are hostile forces in the lowlands behind you or even in pursuit — then you can consider a winter crossing.
Get as close to the mountains as you can, staying below the snow line, and begin your hunting there. Look for meadows (where deer often feed) and even the edges of farmland.
Keep your eyes out for game trails and even streams and creeks where deer are likely to seek water. Remember, you’ll find deer feeding most often near meadows before you’ll find them feeding under the cover of a conifer forest, where pine needles litter the ground, and little vegetation grows otherwise. (They do often bed down under deep conifer cover as these overhead trees prevent heavy snowfall from accumulating on the ground.)
That needs to be considered as you plan your route through the mountains. Where are low elevation meadows? Where are thick conifer forests? Also, where are open, south facing slopes (deer are known to seek out sun on south facing slopes). Distinguish between these areas on your maps. Now, look for streams that run near these areas. Those will likely be places that deer go for water. Now, plan your entry into the mountains, with a plan to hunt in the lower regions, below the snow line.
Hunting Deer or Other Big Game
Once you’re into your trek, look for low-lying banks along the water’s edge. That is likely a natural drinking area for deer. Remember, the lower the bank, the easier it is for a deer to reach the water. Now, look around for signs that deer use this area as a watering hole. Do you see deer scat? How about any deer tracks in the soil? Do you see anything that looks like a game trail leading away or alongside the creek or stream?Set up a blind downwind of that location, so deer are less likely to pick up your scent when they show up to drink; camouflage the opening of your shelter with brush, leaving openings just big enough allowing you to see out along with your rifle or bow; at the same time, do everything you can to conceal your scent.
Now it’s time to wait; dawn and dusk are times that deer may be most active. Keep your rifle or bow ready and keep your eyes on that spot that a deer may be likely to drink from. (You can also set up a blind near a nearby meadow.)
Sometimes you may want to hunt deer at night: – If you’re in an area of the mountains with a lot of human activity, your best bet for bagging a deer (even the biggest deer, say the experts), will be to hunt at night. Human activity can cause deer to bed down during daylight hours, and even stay bedded down during dawn and dusk; these deer are said to have a higher than normal survival instinct, causing them to be active at night under the cover or darkness.
In this case, a specialized scope and / or night-vision goggles can allow a hunter to hunt even in the darkness of night. You may see some really big bucks, when hunting at night. (Just one of those can feed your camp for the next several weeks.)
3. Fish: When it comes to flowing water, which there may be very little to none of in the mountains in the snow, stand over a shallow pool of water with a stick and press any fish you find into the ground. Another method is to arrange large rocks in shallow stream beds, so that fish are funneled into fish traps (made of sticks or other big rocks).
4. Insects: Insects may be hard to come by in the snow; check around stumps, logs, and under rocks near river banks; if there’s too much snow on the ground, you may easily burn more calories digging under snow than you’ll consume eating ants, earthworms, termites, etc. Consider that before making the effort to locate insects — if you can handle insects, that is; it’s not for everyone.
5. Roots: Again, hard to come by in the snow. Further, you’ll need to read up on this in great detail in advance to have any ability to do this in the area you are trekking through.
Specific Gear for Winter in the Mountains

1) Be prepared to wear several layers of clothes; go to bed with 5 or 6 layers of clothes on, if temperatures are well below zero.
2) Educate yourself on proper clothing material for trekking in the snow; cotton can be deadly in the mountains; if you sweat or get wet, cotton loses all insulating properties, clinging to your skin, draining body heat. You can quickly die of hypothermia if in the snow with just cotton. Wool, on the other hand, has long been a material worn by people who live and survive in cold, snowy terrain; today, synthetic materials exist that do just as well or even better than wool.
3) Snowshoes. Cross-country skis. Pull-behind sleds for hauling gear.
4) A small, stainless steel container can be used for melting snow over fire to produce drinking water; it can also be used to boil water taken from streams; a portable water filter is also recommended, so that you don’t have to stop, build a fire, and boil water any time you’re low on water. Lifestraw costs only $22, is proven in the field, and can last one person several months of use (it was also a Time Magazine invention of the year).
5) Emergency space blanket. These are made of highly reflective material that reflect heat, helping people stay warm in cold temperatures. Some brands today are made of multiple layers of material, making them a lot stronger than cheaply constructed mylar space blankets in the past. As a survival tool, they’re also cheaply priced, making one or more space blankets an essential piece of survival gear for every cold winter adventurer.
Space blankets and cold weather survival – Lay one on the ground, reflective side up, underneath your body where you sleep. Lay another one over the top of your blankets or sleeping bag. To insulate your shelter, duct tape 2 or 3 of these together, and use on the underside ceiling of your shelter; this can help keep out the wind (if you’ve built a primitive branch shelter), and it will also help maintain warmth inside your shelter.
Finally, you can create a pipe system that brings hot air inside your shelter, from an outside fire pit, by rolling an emergency space blanket in the shape of a pipe; you can even cut it into smaller strips and create a much longer pipe (using duct tape), or create a couple small pipes; position a pipe end near your fire pit, and with the other end fitted into your shelter, watch as heat suddenly is carried from the fire pit to inside your shelter.
There are numerous ways you can you can use good space blankets to re-direct heat around your camp from a central fire source or simply hot coals. For winter survival in the mountains, these newer, sturdier space blankets could be one of the most effective pieces of survival gear you include on your trek.
5) Scent concealer and snare traps. You’ll set snares for rabbits and other small mammals in the area of where you camp at night; you’ll use scent concealer (such as deer urine) to minimize and even cloak the smells of your camp, as much as possible. Remember, if you’ve done your homework and studied your maps, you’ve chosen a route alongside a major or even minor drainage route; when low on food, you can hunt alongside your route through the mountains. By stalking common watering holes, right from a snow shelter, after a few days of hunting, or even just a few hours, you may land a fairly large buck. Just one buck may be enough to feed your camp for the next several weeks.
Conclusion
Surviving a trek across snowy mountains can be highly dangerous. If the cold doesn’t kill you, an avalanche or fall into a glacial crevasse can. Depending on the temperatures and altitude, it may be hard to find food. Your strategy for crossing through the mountains should revolve around having plenty of food on hand before hand; meaning, you trap small animals down in the lowlands; pack dried meat and survival food (if any is available); and, last, have roots and insects as a last resort, knowing beforehand which roots and which insects are edible in the area you’re traveling through.Study maps and pin point forest service roads as well as trails that lead over mountain ranges (there are usually a few trails in each mountain range that may offer passage … you might do best to hike north or south several miles until you connect with one of these trails than to simply try to blaze a trail over a mountain range, not knowing what’s on the other side of every mountain in your path). Study maps and look for criss-crossing valleys … these valleys may provide a channel that can take you deep into a mountain range and save you needless climbing or simply minimize the amount of climbing and glacial crossings you have to embark on.
Skills to learn in the meantime: How to snowshoe (not difficult with the right snowshoes), cross-country skiing, how to read avalanche dangers, trapping, and snow shelter building.

Additional point of advice: Unless you’re an experienced hunter and trapper, and know your way around the area, get out of the mountains as fast as you can.
Before you freeze, fall into a tree well you can’t climb out of, or simply get swept away in an avalanche.
And finally, always check with a professional with expertise in mountain traversing for the best way to cross such an area. No article can make up for this.
Extra Credit
The following tips were shared by a reader’s personal experience with mountain survival…“Techniques required by high mountains (over timberline) and low mountains (forested) are different. Much of your article deals with high mountains. In my wilderness experience, the big problem in winter isn’t cold, but wet. Below -10C it’s fairly easy to stay dry.
Near freezing, snow melts easily, getting people wet. With adequate clothing, staying warm is easy, if you can stay dry. In deep snow this requires outer wear that sheds snow, wear pants over boot tops to prevent snow getting in and soaking your feet. Clothing should be loose, and worn in layers. Avoid jeans. Usually too tight, and they soak easily. Nylon track pants/wind pants over fleece pants, or acrylic pajama bottoms work well. Acrylic sweaters, fleece, and a wind parka on top.
If passes are short, camp near timberline, and do the pass in a single day. This will allow you to dry gear out by the fire. If necessary, camp two days, and break a trail partway the first day, and return to camp.
Water – Most people don’t drink enough in the wilderness at the best of times. In winter it is hard. A large tin can and a coat hanger can improvise a bucket to melt snow. You need 2-3 liters a day. You will need about 5000 calories a day for moderate to heavy work in the mountains. Powdered juice, hot chocolate powder, etc make snow melt water more palatable. Anything with a high percentage of fat is good — summer sausage, cheese, nuts.”