


One of the comments on the adaptive gardening article mentioned straw bale gardening, so I thought I’d write about my experiences.
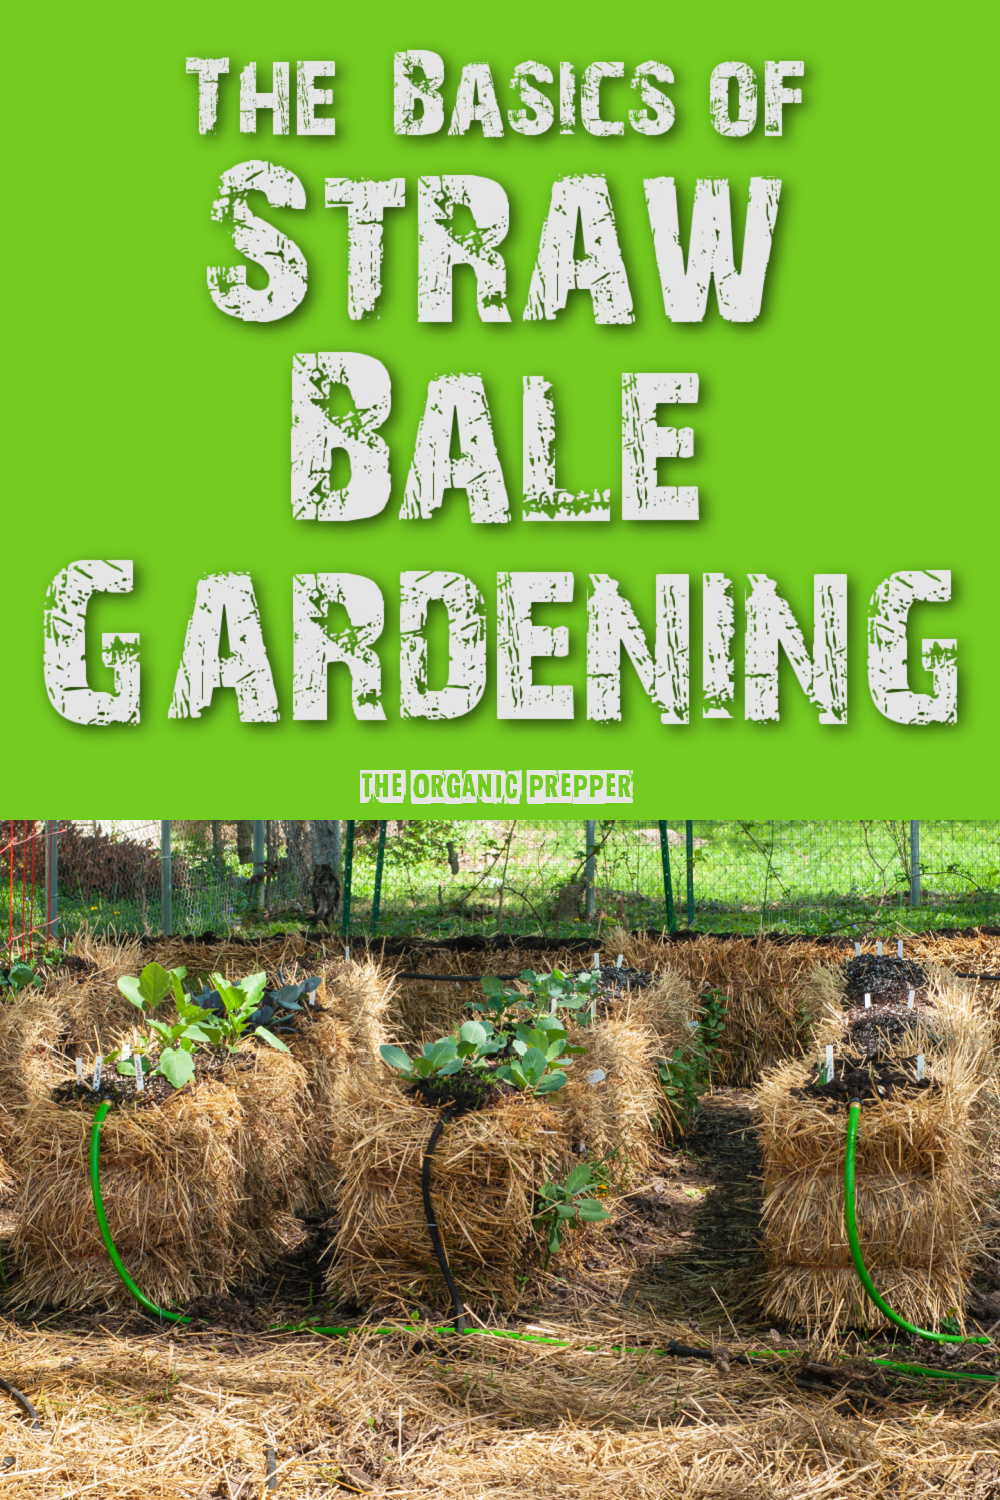
Straw bale gardening can be considered a form of adaptive gardening. It’s also a form of container gardening. One grows in a straw bale, and pretty much anything can be grown. Weeding is minimal, and there’s no need to bend down much since the bales are a couple of feet high.
The big guru in this kind of gardening is Joel Karsten. His book Straw Bale Gardening Complete is considered seminal in the field and he even has a website.
Pros and cons of straw bale gardening
So what are the pros and cons? As stated above, it’s easy on the back and much less physical than other forms of gardening. There’s no digging, not even to harvest. Root crops such as potatoes don’t have to be dug. Just kick the bale over and there you are!
If your soil isn’t the greatest, straw bales can be an effective solution. No worries about endlessly amending your soil here! In fact, the used straw can be turned into other areas for use as organic matter, in time creating a healthy expansion of the garden.
When I did this back in 2015 or so, bales of straw were $2-$6 per bale. I don’t know what they’re going for now but I’d suggest a local farmer if available. That’s got to be cheaper than any store, assuming you can even find a store selling them. Decorative bales from craft stores may have been sprayed with a fire retardant. You don’t want those! Those chemicals are toxic to plants.
The decomposed bales can be used in the second year as well. Potatoes are one good crop for this method but I can see trying other things. I don’t see why you can’t grow tomatoes, peppers, or anything else from your first year garden. Just make a pile or put the remains in an enclosed area, similar to a compost bin.
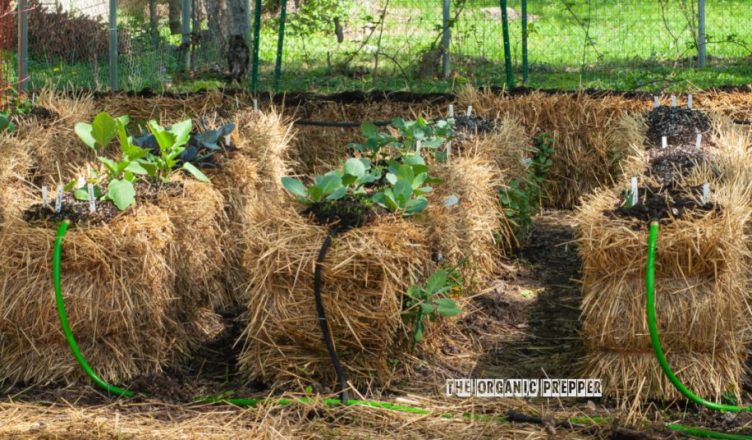
Again, you can grow pretty much anything. I grew tomatoes and peppers, and had a good harvest. It’s also possible to grow things in the sides, such as flowers. I had less success with this, possibly due to lack on conditioning on the sides.
As for cons, this is a messy way to garden. It’s not a Better Homes and Gardens thing, especially at the end of the season. If neatness is important to you or your municipality, this may not be your best choice.
They are heavy to lift, especially when wet. Think end-of-season cleanup.
Bales can be a bit unstable, especially if you’re growing tall, heavy things like tomatoes. I used a sturdy metal fence-type structure to stabilize them on both sides and fastened the structure together with hemp twine. Chicken wire won’t work. Cattle panel or something in that metal gauge might. Remember, it’s not just the tomatoes but the trellis as well.
You’ll need to water them more frequently, more like containers than raised beds. I ran a drip hose down the middle of my bales. It worked quite well.
Be sure to get the right base
One very important point: you’ll want straw bales, not hay. Hay will have more weeds, but in either case, the bales themselves will sprout. Mine didn’t get so far that I needed hedge trimmers, but it does contribute to the untidy appearance.
One thing to ask about is whether or not the field your bales were harvested from was treated with any kind of pesticide or persistent herbicide. Examples include aminopyralid, clopyralid, picloram, or aminocyclopyrachlor. If it was, find bales elsewhere. Your crops won’t grow well here. In fact, these toxins can contaminate your entire garden including your compost pile. If the damage is severe enough, you won’t be able to plant in that area again for years. Don’t go there.
One very important thing you’ll have to do before you can plant your bales is condition them. Conditioning is the process of starting the decomposition of the bales, releasing the nutrients for plant use. Clemson University gives some useful information and a good condition schedule here. I used lawn fertilizer, which is very high in nitrogen, and I don’t recall using any kind of ammonium sulfate or dolomitic lime. It’s been quite a while, however, so I may be misremembering. I followed the procedure in Karsten’s book, and yes, it takes about two weeks.
Be careful with fertilizers.
One thing to be careful of if you’re using lawn fertilizer: avoid those with herbicides or anything funky in the mix. I used the granular stuff since I was watering from my sprayer hose, and liquid fertilizer is more difficult to spread uniformly. I don’t recall spreading any kind of soil medium over the top, although I can see this being useful if you’re planting from seed.
In looking over my pictures, I see that I did fill the holes with soil when planting. That would ensure good root-soil contact. Planting is quite straightforward: just dig the hole in the bale, place your seedling, fill it with soil, and water in.
The basic idea of straw bale gardening
Here are the important considerations of straw bale gardening.
Straw, not hay.
No pesticides or herbicides, and choose your fertilizers carefully.
Be sure your conditioning is thorough.
Remember to water often! Bales, like other containers, dry out more quickly than soil in raised beds.
Finally, be sure to check your municipalities regulations, especially when it comes to second-season use of the decomposed straw. My city requires that compost piles be enclosed, and the bale will look a lot like a compost pile.
Have you ever tried it?
Have you tried straw bale gardening? How did it work out? Do you have any suggestions for new straw bale gardeners?
source Amy Allen