
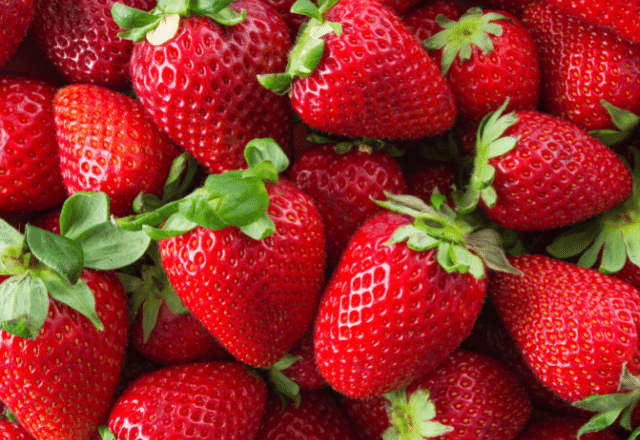


Strawberry season is in full swing. Now is the time to stock up on those delicious vivid red berries!
Some strawberry trivia: Strawberries are not actually a fruit, but a member of the rose family. They are the receptacle of the flower and were first cultivated for eating in ancient Rome. Native Americans called them “heart seed berries” and baked them into cornbread.
Health Benefits
Besides that spectacular taste, why should you eat strawberries?
- A one-cup serving of strawberries provides 100% of the RDA of Vitamin C. Vitamin C is a powerful antioxidant and immune system booster.
- Strawberries help protect against heart disease by protecting the blood vessels from oxidative damage and inflammation. The phytochemicals that are abundant in strawberries counteract the effects of low-density lipoprotein (LDL or “bad” cholesterol), which aids in reducing the plaque buildup in the arteries.
- Regular consumption of strawberries can lower a person’s risk of Type 2 Diabetes by aiding in blood sugar regulation response.
- There is some evidence that strawberries can reduce symptoms of inflammatory bowel problems like IBS, ulcerative colitis, and Crohn’s disease.
- The antioxidants in strawberries can defend against cancer. Vitamin C, ellagic acid, lutein, and zeathancins have been proven to suppress the growth of cancer cells.
- Strawberries are also loaded with other valuable nutrients, like potassium, fiber, and magnesium.
- A one-cup serving of strawberries contains only 52 calories, a great benefit if you’re trying to lose a few pounds.
Widget not in any sidebars
Growing Strawberries
Strawberries are fun and easy to grow. Best of all, they’re a perennial, so you don’t have to plant them every year – they just magically start blossoming come spring. The first year, don’t expect an abundant harvest – but after that, you may just end up with more strawberries than you can eat! You can learn everything you need to know about growing strawberries HERE.
If you don’t live some place where you can grow them as perennials, don’t despair. Certain varieties flourish in pots and hanging baskets. Some urban farmers overwinter their containers and set them out again in the spring with good results. Learn more about growing strawberries in containers HERE.
The obvious benefits of growing your own strawberries are the great price and the fact that you have control over the farming method – no nasty pesticides for you!
Washing and Storing Fresh Strawberries
Moisture is the enemy when it comes to keeping your strawberries. It is best to store them in the refrigerator (not in the crisper) and wash them just before eating them. This reduces the rate at which the strawberries will mold.
If you want to store them already washed, line a baking sheet with paper towels. Gently dry your strawberries and then place them on the baking sheet. This will absorb moisture and keep them fresh for longer.
I recommend organic strawberries if possible. Here’s why:
For example, don’t be fooled by those juicy non-organic strawberries displayed in the market. They may look luscious, but they have a dark side. Their red color has been enhanced by a fungicide and they have been infused with methyl bromide, a gas that is injected by tractor into their growing soil. These substances then become part of fruits’ flesh, and can’t be washed off.
This being said, not all conventional strawberries are grown this way. I often get strawberries from the farmer’s market that are non-organic because I’ve been able to ask the farmer about his or her growing process. There is a world of difference between a small local farm conventional strawberry and a grocery store shipped-across-the-planet strawberry. Don’t be afraid to ask questions. Most farmers really enjoy talking about the growing process. (Find a local farmers market HERE.)
How to Preserve Strawberries
Now for the really fun part – let’s talk about what you can do when your strawberry bounty is too abundant for you to eat them all before they spoil! We’ll discuss 3 methods of strawberry preservation.
Dehydration
Dried Berries
- To dehydrate strawberries, there is a little bit of prep work. Wash them as described above, then place them in the fridge on a paper-towel lined cookie sheet for at least an hour.
- Remove them from the refrigerator. Remove the stem end and thinly slice the berries long ways, about 1/8 to 1/4 inch in thickness. Place the slices in a single layer on the racks of the dehydrator.
- Dry according to the directions for your dehydrator. I have an inexpensive one and it usually requires an overnight stay in there (about 8-10 hours) to get the berries sufficiently dry.
- The dried strawberries are great in trail mix or rehydrated for baking. If you expect to have them for long, you’d be wise to hide them from your children because mine seem to think that they are candy.
Fruit Leather
- If you have some mushy strawberries, don’t despair: you can still use your dehydrator.
- Remove the stems and place them in the blender to puree them. At this point, you can add another fruit if you want to – pears, apples, other berries or bananas make a tasty mixture.
- Line your dehydrator shelves with parchment paper. Pour the puree in a thin layer on the parchment. I space big glops of puree on the parchment – I find this dries a little bit better than covering the entire parchment.
- After 12 hours, you will have a delicious, homemade fruit leather with no artificial colors, flavors, or sugar.
Freezing
- Wash the berries as outlined above. Remove the stems.
- You can either halve the berries, slice them, or leave them whole.
- Place them in a single layer on a cookie sheet in the freezer. Once they’re frozen, place them in a large freezer bag for use in smoothies or baking.
Canning
My favorite method of preserving anything is canning! Strawberries are sufficiently acidic, so you can use your water bath canner for strawberries.Strawberry Jam
Ingredients
- 8 cups of strawberries
- 1 packet of pectin + ¼ of a package (I like to use the no-sugar-needed, but then still add sugar – just less!)
- 4 cups of sugar (I use organic turbinado sugar)
- 1 tbsp of lemon juice
Directions
- Prep your strawberries by washing them and removing the stems.
- Smush your berries. You can do this with a potato masher, food processer, blender or food mill. Some people like to puree them and have a smoother jam and others like chunkier jam – it’s up to personal preference.
- In a small bowl, use a fork to mix ¼ cup of the sugar with one packet of pectin.
- In a saucepan, stir the fruit, lemon juice and pectin together well.
- Bring the mixture to a boil over medium heat, stirring frequently.
- Once it is boiling, stir in the sugar and return to a boil for one minute.
- Test your jam…(see below!) If isn’t the proper consistency add the other quarter packet of pectin, simmer for another minute, then retest.
- Ladle the jam carefully into your awaiting sanitized jars, wipe the rim and cap your jars with snap lids and rings.
- Process in a water bath canner for 10 minutes, adjusting for altitude.
*****Jam Making Rule of Law:
Always test your jam!!!!
How?
You do this by keeping a spoon in the freezer – to test, drip a bit of the hot jam into the spoon to allow it to quick cool – the consistency it reaches is the consistency your finished product will be. At this point, I nearly always end up adding another 1/4 – 1/2 package of pectin – I use the cheaper pectin to “top it up” – return to a simmer for a couple of minutes and test again. Omitting this step may result in a very tasty ice cream topping or waffle syrup, but not jam!
Canned Strawberry Filling
These jars full of deliciousness can be used for pie filling, ice cream topping, stirred into yogurt, or for a mid-winter treat of strawberry shortcake. (My October baby likes strawberry shortcake on her birthday!) This recipe doesn’t even resemble the gelatinous goop you get in cans at the grocery store.
Ingredients
- 6 pounds of strawberries
- 4 cups of sugar (I use organic turbinado sugar)
- 1/2 to 1 packet of pectin (The USDA recommends a modified cornstarch called Clear Jel, which I have never tried)
- 6 cups of red grape juice
- 1/2 cup of lemon juice
Directions
- Prep your strawberries by washing them and removing the stems.
- Slice your berries or cut them into halves or quarters, depending on your preference. I like chunkier pieces of berry.
- In a small bowl, use a fork to mix ¼ cup of the sugar with half the packet of pectin.
- In a saucepan, stir the fruit, lemon juice, grape juice and pectin together well.
- Bring the mixture to a boil over medium heat, stirring frequently.
- Once it is boiling, stir in the sugar and return to a boil for one minute.
- You may get a weird pink foam on top – just skim it off and discard it.
- Test the consistency to see if it is what you are looking for. If isn’t the proper consistency add the other half packet of pectin, simmer for another minute, then retest. Keep in mind that when it’s time to make your pie/cake/concoction, you can whisk in some cornstarch to thicken it further if needed.
- Ladle the filling into your awaiting sanitized jars, wipe the rim and cap your jars with snap lids and rings.
- Process in a water bath canner for 30 minutes, adjusting for altitude.

source : Daisy Luther