


Evacuation Survival Guide – How to Survive a Catastrophic Disaster in a Major City
In a disaster of this magnitude, most people in large cities will have no choice but to evacuate. The danger of an evacuation in a catastrophic disaster is that you are limited to how much food you can carry, while also carrying essential supplies you (and your family) may need to survive.

But what if you could carry more food than other people?
In this article:
How to carry 15-20 days worth of food, without adding a ton of weight or bulk to your backpack.
When you get to where you’re going you’re going to need a way to replenish those food supplies — How to Find Wild Food to Survive the Disaster.
Tips for Evacuating to Distant Towns That are Turning Away Refugees — How to get past road blocks and be known and liked by locals.
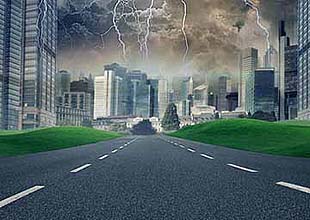
Evacuation Following Disaster. The Region is Leveled and in Flames. Refugees Flee for the Hills and Highways.
Unless you’re in a plane crash, or in an evacuation from an area struck by a disaster, in order to be prepared for any emergency you should have a fair amount of extra food on hand, enough to feed every person in your family for several days — and in some situations — several months.When civil emergencies take place a power outage can cause supermarkets in town to close down; weather, distance, and / or disaster conditions can even prevent a trip to the store for food, if some stores are able to stay open.
Unless you have a food storage plan in place before this disaster, you may run out of food in just the first few days.
Organizations like the American Red Cross recommend having several days worth of food on hand, food for each person in your family.
That’s the minimum amount of food you should have stored.
Food Storage to Last Several Months
But if you’re concerned like many people are nowadays of a catastrophic disaster taking place, you should take steps now to stock up on food to last several months, even a year or more.Stockpiling food may not apply to everyone though. The reason is this: People who live in highly populated areas — New York City, Chicago, Los Angeles, San Francisco, Seattle, Denver, Minneapolis, Detroit, Boston, Houston, Miami and so many other cities will likely have an evacuation on their hands.
In a time period that we are seeing an increased number of disasters on American cities, and several of these disasters are bigger than the norm, the next disaster (or even a terrorist attack with a weapon of mass destruction) could be one that leaves you with no option but to flee.
Your house may even be destroyed, your neighborhood and much of the city in flames from exploded natural gas lines.
Evacuation may become your only hope for survival.
Food Storage and Evacuation
In an evacuation, you will be limited to how much food you can physically carry. If you live in a populated area, and forced to evacuate on short notice, your food storage strategy may be a lot different than a person who lives in a small town or suburb.
Food Storage in a Suburb or Small Town
If you live in a distant suburb or small town you can stockpile several months worth of food. Your hope is that the area you live is not likely to be affected by riots or large numbers of looters or people driven by starvation that are willing to now rob people in order to get food.
Looters and Scavengers
If you live in a suburb, you may be faced with a wave of looters and scavengers within the first few weeks of a major disaster; even possibly the first few days. It will only take a few days before people — who didn’t stock up on food before the disaster hit — now abandon the cities and set their eyes on the suburbs as places where there just might be some food.
Hiding Food from Looters
** Create a couple areas in your home or on your property where you can safely hide food and in such a way that most people will never find it — even people who are looking for places where food may be hidden. If looters come across your home several weeks after a disaster — and you and your family look well fed — they may assume you have a food stash somewhere and may demand access to it — maybe even at gunpoint.** Have a dummy cache. A dummy cache is a “false” area of food supplies that you can hand over to looters if any “get the jump” on you, breaking into your home and holding you or your family at gunpoint. A dummy cache should have a fair amount of food in it so that looters believe it’s your primary food cache. The food in your dummy cache doesn’t have to be edible — it just has to look edible. In fact all of the food in your dummy cache can be expired.
Looters may not be concerned about the expiration dates anyway; they may just grab it and run.
Bulking Up Your Dummy Cache
Currently, if you’re stocking up on non-perishable food and months or years are passing without a disaster, move the expired food to your dummy cache; the more food you have in your dummy cache, the more convincing you will be when you lead looters to it, who are demanding your food supplies. You can also have bags of white rice and even dried mashed potatoes — these are cheap to buy and add more “bulk” to your dummy cache.With a dummy cache built, now focus your attention on 2 – 3 areas in your home or on your property that you can hide food.
Where to Hide Food
Hide Food Underground — Dig a large hole in your back yard and drop in metal containers or plastic or wooden boxes, fill these with food with a long shelf life, and then cover with a plywood top and finally dirt and sod, so the hole where you hid your food looks like part of the yard (this is a great idea for water storage also).Hide Food Under a False Floor — Construct an area under the flooring of your home that is covered by “false flooring” so that even if looters pull back the carpet, all they’re going to see is floor — not the lid of a hiding spot. The area you construct should be so well put together that even if people pull up flooring, they won’t be able to tell at a casual glance you have a food stash there.
Hide Food in a False Room — Small narrow rooms can be built that other people aren’t going to realize are in your home — not unless they compare the outside dimensions of your home with inside dimensions. An interior bedroom wall could have the drywall torn off, and then the interior portion of the wall increased to provide space for storing food; with this space increased from a few inches to 2 – 3 feet, additional framing could be put in place, and a new layer of drywall back up.
You now have a great hiding place (with space for storing food from floor to ceiling) that most people will never know is there; the trick is building a hidden door into the false wall. Consider how you’re going to do that before beginning construction.
Perhaps your entry can be from under the house or even from the top of the ceiling, through the attic, where rope tied to containers in your wall could be used to hoist up food supplies. Or you can use screws in each corner of the wall to hold up the drywall, that can be simply unscrewed when you want to remove the drywall and get to food supplies. Hide these screws with molding/wood trim across the top and bottom of your wall.
Hide Food in a Basement Tunnel — Tunnels have been used successfully by smugglers and even primitive people at times in ages past. In the Vietnam War the Vietcong were notorious for building complex tunnel systems. From somewhere in your basement, have a hidden floor or wall that opens to your tunnel, and then closes behind you in such a way that people looking for it on the other side won’t be able to find it on casual inspection.
Your tunnel can have an exit to the outside world also — depending on the layout of your property of course. That exit might be through the floor of a garden shed, under a bush (planted on top of the door/hatch), or even into an old dog house (what looks like an old dog house anyway). Be creative — put some thought into this. A tunnel with a large room could even serve as an underground bunker. Be careful during construction; be sure the construction of an underground tunnel and / or bunker is well researched and you (or the people you hire) know what you’re doing before you put this together.
A person with an extra $20,000 or more to put into this can drop in an on-road / off-road motorcycle and a few gallons of extra fuel (this means you’ll have transportation after a catastrophic disaster). Include a “Faraday Cage” or two for protecting small electronic devices as well as protecting back up battery power from the effects of an EMP – electro-magnetic pulse.
Food for Evacuation
If you live near a city, or in a suburb and even a smaller town, you may have to evacuate. Evacuation will depend on the size of disaster, type of disaster, and any other situation or danger that may be taking place.In the survival community, the term “bug out bag” has been used to describe a small backpack packed with about three days worth of food and water; it’s also been used to describe a much larger backpack, typically worn by backpackers and even the military on multi-day excursions lasting a week or more.
Whatever you want to call this large backpack, let’s look closely at what foods can be packed for an evacuation that may be 50 – 60 miles in length in just the first few days.
Freeze-Dried Food
Many backpackers carry freeze-dried food; these easy to prepare meals are a lot more palatable typically than an MRE (military ration — or simply, “Meal Ready to Eat”). Considering that you’ll be packing drinking water, clothing, self-defense items, sleeping gear, possibly a tent and tarp, and survival tools for cooking and for light, you’re going to be limited to how much food you can carry.Expect to carry a pack weighing 80 pounds or more — that’s a large pack of course. It’s going to call for being in good shape also and the ability to carry a pack this size for several days.
Getting in Shape for an Evacuation with a Heavy Pack
Survival Tip: Part of preparing for a widespread disaster should include physical fitness. As a Christian I push “spiritual fitness” first of course, which comes from a right relationship with God through Christ (who “rescues us from the coming wrath”, a promise in the Bible). But for people who aren’t ready for that step yet, then of course physical fitness is going to be a key factor in whether or not you’re able to survive a long term disaster when faced with a lengthy evacuation from a disaster area.Hit the treadmill now and then start hitting the trail. Prepare yourself by carrying heavier packs. What would soldiers in the U.S. military do to get themselves in shape for long marches? Think along these lines. At the same time, get yourself psychologically ready for the challenge of evacuation to a distant area that may be many miles and many days travel by foot — with possible obstacles and dangers along the way.
For the first time in your life you may have to travel “cross country”, meaning no roads and no trails, or only partial road and partial trail as you navigate rural and remote areas to get to your destination.
Think of the Jews, Poles, Italians, French, and others who fled Hitler’s forces in World War II. Many fled across the country side and into the forest, bringing with them only what they could carry.
How to Carry Excess Food in Your Backpack
A large backpack with typical survival supplies only holds about 5-7 days worth of food. But if you pack smart, and make a few modifications to any freeze dried food you have on hand, you can increase the amount of food you carry to 15-20 days. Read that again.So how do you increase the amount of food you can carry by 15-20 days? Pay attention here:
1) On the day you’re going to evacuate, take each bag of freeze dried food and pound it (using a hammer) into dust / particles. Have you ever smashed a bag of Top Ramen? The contents of the package quickly shrink to a smaller volume. That is the science behind what you’re doing to your freeze dried meals now.
By the time you’re done pounding each freeze-dried meal with a hammer, it will no longer look like a freeze-dried meal — it will look a lot more like powdered soup or powdered potatoes or powdered eggs.
The calorie count will still be the same though.
2) Now do this to another 15 – 20 days worth of freeze dried meals. For those of you keeping track, that equals 2 – 3 freeze dried meals per day or 45 – 60 meals in total.
3) Next, you’re going to open each meal that you have smashed and place it into 3 – 5 heavy duty Zip-Lock freezer bags (or simply 2 – 4 plastic containers with sealed, screw on lids).
4) Next, transfer the contents of each package into the Zip-Loc bags or plastic containers.
What this does is conserve space in your backpack — enabling you to carry several days worth of food, more than you may normally be able to carry.
** Note: Because you have opened the freeze dried food, and exposed the contents to oxygen, you’ve now greatly decreased the shelf life; Mountain House (a manufacturer of freeze-dried food) states that once opened a freeze-dried meal (which normally lasts several years) should be eaten within a week; because you’ve transfered this food to sealed containers my opinion is that you should be ok for at least another 2 – 3 weeks.
** You can increase the amount of nuts you carry, such as peanuts, by pounding these into powder also. Or you can buy “dried peanut butter” or simply “peanut flour” from places like Trader Joes. These come to life (become palatable) when mixed with other liquid substances — water, jelly, honey, that kind of thing.
** While it may not seem that “tasty” to pound freeze dried meals into powder, you have to remember that this is survival we’re talking about, in a time of mass devastation, when many people have lost their lives and disease and starvation are likely to follow in places — who cares whether or not your food looks like “beef stew” or “lasagna” or “Denver Omelet” or whatever is shown on the package of your freeze dried foods?
Your goal is to increase the amount of food you can carry, which increases your evacuation range, and increases the chances your have of living through this disaster without going hungry.
Dried Meat
Dried meat is a great source of food to have on hand. Once dried, meat becomes light weight and even shrinks in size, while still providing protein and calories to help you stay nourished.Over the counter beef jerky isn’t a good choice — it’s over priced and most brands are loaded with additives that can affect your health if you have to suddenly live off beef jerky for several weeks (if you’re going to buy jerky, buy from healthier food stores such as Trader Joes).
Back in the 1700s and 1800s, both Native Americans and early American pioneers who set off on trips by foot or by horse for several hundred miles, would have loaded up on plenty of dried meat first.
Today you can learn how to dry and store meat using primitive methods of food storage right at home. By doing this you’ll build up a supply of meat to carry with you in the event of an evacuation; prepared and dried correctly, this meat can last you several months or more, if needed.
Energy Bars
Energy bars are also a great food to include in the event of an evacuation; packed right, you can easily carry 20 – 30 bars. If you include these with your 15-20 days of freeze dried food and generous stores of dried meat, you’re going to have quite a bit of food for the road. You may have enough food to last you nearly a month.Survival Tip: If your pack is too heavy to carry on your back, figure out a way to carry food or supplies tied to your chest. This way not all the weight is being carried on your back. (As said earlier, carrying this kind of weight is going to call for being in good shape.) Or, use a game cart (hunters use game carts often to carry hundreds of pounds of meat out of the backcountry).
If you don’t have a game cart, come up with something else you can rig to use as a cart for carrying supplies and taking quite a bit of load off your back.
After Day 20
Let’s say you did this right. Let’s say you were able to carry 15-20 days worth of freeze-dried food, dried meat, and even energy bars with you in an evacuation. There’s a chance you may land in an area with 50 thousand to another 100,000 people who have also evacuated in the same direction. This may be a “FEMA camp” or an area created by the Red Cross to help people who have suffered a major disaster and now have nowhere to live or food to eat.Do you and your group really want to hunker down with a hundred thousand other people though? The first day that food runs low in this “refugee” camp might be the day a few dozen people raid your supplies and clean you out of any remaining food you have.

On the other hand, it’s very possible that the disaster or disasters are so widespread that there is no evacuation center for refugees in the direction you’ve fled. Perhaps you and a few dozen other people are on your own. Or perhaps it’s just you.
The more remote you are, after evacuating, the better chances you have of holding on to your food stores, while getting away from crowds of people that might go a bit stir-crazy following a major disaster, when hunger sets in.
Replenishing Food Supplies
You need to have a plan in place for replenishing your food supplies. The best plan is when you have other people on board before a disaster strikes, people willing to work with you in a time of disaster to help each other stay alive. You might live in a city like Chicago or Los Angeles — these are likely areas that are going to call for wide-scale evacuations should terrorists or a rogue government strike America with nuclear weapons or another weapon of mass destruction — such as a deadly virus or chemical weapon.A plan to evacuate to a distant small town is going to be in store. Do you have friends or family in a distant small town you can evacuate to? Make plans in advance for the evacuation. Discuss the evacuation with that person well beforehand.
Once your friend or family member is on board with your plan, start purchasing food with a long shelf life (such as freeze-dried meals), canned food, and other non-perishable items, and make a few trips to that friend’s home you plan to evacuate to, and then store your food there. You’ll also want to store water — several months worth of water, to be safe.
Alternative Path Into Town
There’s a good chance that evacuations of cities like Los Angeles and Chicago may not be met with open arms by distant small towns that feel overrun or have suffered attacks by looters and armed criminals in the days following the disaster.Study a map and the terrain and be aware that you may come across road blocks with armed citizens preventing people from entering town. Men with guns positioned at each road block may not care that your Uncle Lou who lives on Third Street had told you you had a place to stay in the event of a disaster. They may tell you to hit the road, there’s just not enough food in town to feed everyone who’s fleeing the cities.
With this scenario in mind, determine an alternative way into town, even if you have to make a 10 mile detour, crossing through woods and farm land, to get to Uncle Lou’s house.
Clean Up Before Entry
On the outskirts of town: Change into clean clothes and shoes; hide your backpack (you can retrieve it later); comb your hair and give yourself a shave; and then emerge from the woods and walk through town, like you’ve lived there all your life.Using binoculars study the town from a distance first; make sure that citizens are walking the streets or out in yards; make sure that everything looks “normal”; if there’s a curfew of any sort in place, you don’t want to be stopped and questioned. Your answers might not hold up well to questioning — you might get thrown out of town, without ever making it to Uncle Lou’s.
Survival Tip: To increase your odds of being received by the town you hope to evacuate to, spend some time there beforehand. Vacation on weekends at Uncle Lou’s place. Get familiar with the town. Become known at the local gym or recreation center. Shop at corner stores and get to know the clerks and store owners by name. Plug yourself into a church. Get to know the locals and make some friends. Even better — volunteer somewhere.
By becoming known in town … If you ever have to flee the city where you live and work — and your hope is to evacuate to a distant town that might not be receptive to mass numbers of starving people fleeing the cities — you increase your chances of being accepted by the town you hope to flee to. You help avoid getting the boot from the powers that be.
Evacuation into the Mountains
Using the steps above, you can carry several days worth of food, more than what is typical. Depending on the season (winter or summer, for example), you can decide to attempt an evacuation to a small town, as mentioned above, or you can head straight for the wilderness, if you know how to hunt and fish.Your evacuation can take you straight into a wilderness area such as a nearby mountain range if you’ve thought about this and plotted a course of travel well in advance.
If you have 15-20 days worth of powdered freeze-dried food and dried meat, you’ll have several days of food to live off while you set up camp and start hunting for that first large animal (deer or elk, for example) that will get you by for several more weeks, should you take one down.
(Or, if you flee to a wilderness area near a remote area along the coast, you can turn to fishing. See: Survival: Native American Methods for Catching Fish).
Knowing how to hunt large game — and learning what the expert hunters say about hunting deer, elk, and other animals — can get you plenty of food, should you have to live off the land long term.
Many people have lived off the land in centuries past. Many people have also died by simply failing to do their research well in advance — such as 17th century pilgrims landing in America with no ability to hunt or no understanding of what crops grow best in the soil in that area on the coast. (Native Americans came to the rescue of a starving pilgrim camp in one instance, teaching the pilgrims how to hunt local food as well as how to use fish and fish guts to fertilize the soil so that crops would grow).
Large Game Animals will Be Key to Survival
Hunting large game is a key survival skill — I’m not talking about just being able to put on camouflage and know how to shoot a target with a rifle or bow. I’m talking about learning the ins and outs of the animals you hope to hunt — what they eat, when they eat, how to take one down, how to use bait, how to set up stands, how to conceal your scent — and specific advice for the region of the country you’ll be in.One of the best tips you’ll learn from expert and experienced hunters is this: Where deer and elk are most likely to be based on the season and the amount of hunting in an area. See: Elk Hunting and Living Off the Land.
Knowing where to find large game, especially animals that have been driven to more remote areas (due to “hunting pressure”) by recreational hunters, greatly aids in being at the right place at the right time, doing everything right (such as understanding wind direction) and not doing anything wrong (such as not being well camouflaged or concealing your scent, as much as possible).
The only hope you’re going to have in living off the land long term will likely come down to hunting large game (unless you’ve got several months worth of food stashed somewhere in the mountains). Remember, just one large buck (deer) or bull (elk) can supply a few hundred pounds of meat and feed you and your camp for several weeks.
Wild Edibles vs. Large Game
Being able to identify wild edibles (plants and insects) can be valuable skills in the short term, but in the long term it’s going to come down to large game — if you’re going to live off wild food for any serious duration of time — and sometimes even bears or big cats or other dangerous predators in the land.If there are predators in the land, you can cook these animals over the fire just as well as any deer or elk you take down. Just be careful you don’t get yourself killed going after one of these predators (baiting and trapping will be the safest ways to take down predators).
After you take down any animals, dry that meat using primitive methods — then set out to hunt more game, even if you have to travel 20 – 30 miles from camp to an area that is prime for hunting.
In Summary
** On the day you have to evacuate, pound 15-20 days worth of freeze-dried food into powder/small particles and store in Zip Loc freezer bags or plastic screw-top containers. Don’t worry about looks or taste — this is survival. Your goal is to carry as many days worth of food as possible. Calculate how many meals you’ve pounded into a powder and then figure out what size measuring cup to use to get 1000 – 1500 calories a day out of this.** Learn primitive methods for drying meat and / or use modern tools for drying meat at home.
** Get yourself in peak shape — be able to carry a heavy backpack vast distances.
One more thing to add —
** Change your eating habits. Humans can live off a lot less calories than many Americans are accustomed to eating. Benefit? You’ll shave body fat and you’ll be healthier and may even have a lot more energy.
** Know how to hunt large game in your area and know how to shoot that rifle or bow you plan to hunt with.
** Have a family member or friend in a distant town that you can flee to in the event of an evacuation from your area, should you live in a major city. Take steps in advance to store food supplies at that person’s home, as well as wilderness supplies.
** Keep in mind — that distant town you flee to may work out just fine for the first few weeks or months. At some point though it too may become a dangerous place to be, should additional disasters strike or the nation suffer a collapse.
Should that day happen, be ready and able to hit the trail. The mountains or the North Country may be calling.