
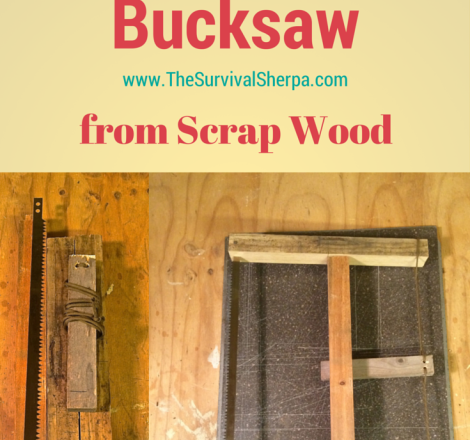


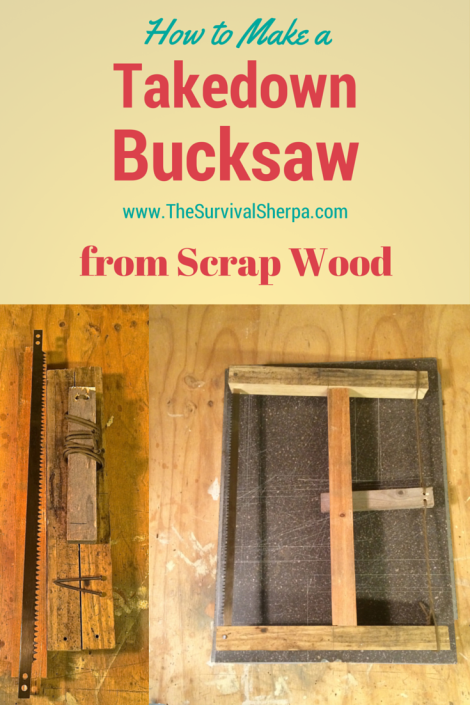
How to Build a Sturdy Takedown Bucksaw
A saw is safer to use than an ax. My Bacho Laplander folding saw has performed admirably for over 4 years. With an eight inch blade, this fine folding saw has its limitations when cutting larger diameter wood. But I love its portability. It has a permanent spot on my ring belt when I venture into the woods.
I’ve used my folding saw to cut up to 4 or 5 inch logs. Over that diameter, I usually reach for my ax. But here’s the catch…

I sometimes need a clean cut on larger logs for projects at my trapping shelter. A bucksaw would fit the bill perfectly. The thing is, I don’t want to haul one of my bucksaws to the woods. They’re too cumbersome to carry.
A takedown bucksaw would solve my problem! I needed something that I could break down and toss in my rucksack.
Dave Canterbury to the rescue! I’d seen him make a bucksaw from a few sticks in nature a few years ago. I ventured to my shelter in the woods to make one.
My attempt to make one from red cedar was a fail. I didn’t carve a mortise and tenon joint on the cross member (fulcrum). I figured, lazily, that a point on both ends of the cross beam would work. Not so. It was fun to make but was not sturdy enough to cut small dried limbs. Thankfully, Dave also made a video tutorial for a takedown bucksaw from dimensional lumber.
Back to the drawing board in my shop.
Here’s how I made mine. (I’ve uploaded a video I made that may help with details on this project. It’s at the end of this article if you’d like to watch.)
Gather the Stuff
- 1 Bacho 51-21 Bow Saw Blade, 21-Inch, Dry Wood (under 10 bucks on Amazon) – the saw blade will be your biggest expense on this project
- 60 inches of 2×2 lumber (dumpster dive at building sites or buy at a building supply store)
- 10 inches of 1×2 lumber (scrap pallet wood)
- 2 – 10 d nails
- 50 inches of 550 paracord
Tools
- Saw
- Drill and bits
- Hammer or maul
- Wood chisel
- Vice – helpful but not necessary
- Pencil
- Measuring device
Note: I built this takedown saw in my pajamas at 2 AM. Couldn’t sleep so thought I better get busy Doing the Stuff. The only power tool used was an electric drill. Didn’t want to risk waking DRG and the neighbors. 🙂
Cut the Stuff
If you don’t have scrap 2×2 lumber lying around, rip a 2×4 in half (with a table saw). Unless you’re skilled in carpentry, I don’t recommend using a circular saw to rip 2×4’s. You’ll need those fingers later.
Cut List
- 2 – 15 inch 2×2’s (verticals)
- 1 – 20 inch 2×2 (cross beam)
- 1 – 8 inch 1×2 (tension paddle)
Prep the Wood
Make a center mark on the two vertical pieces. This is where the cross beam will mate in a mortise (female) and tenon (male) joint.
Cut tenons on both ends of the cross beam. Mark a line about 1/2 inch on all four sides of each end of the cross member. Secure in a vice and cut the lines about 1/4 inch deep on all four sides on each end to create a shoulder tenon. Once cut, chisel the cut pieces away from the ends of the stock.
Cut a 1/2 to 3/4 inch slot on the bottom ends of each vertical piece. These slots will receive the bow saw blade. Drill a hole that will snuggly fit the 10d nails in each of the two slotted ends.
Now align the tenon on each vertical at your halfway mark and pencil in the shape for the mortise. Drill a hole inside the outline to match the depth of the tenon. My tenon’s were 3/4’s long – about half the depth of the 2×2 verticals. Chisel out the remaining wood from the mortise joint to the proper depth. Dry fit the cross beam to the verticals. Tweak the mortise as needed to gain a snug mortise and tenon joint.
Assembly
With the cross beam inserted into the verticals, install the saw blade in the two slotted ends of the verticals. Remove the blade and place it on top of the slotted verticals. With your pencil, outline the holes and bore the appropriate size hole that matches the nail you will use as a pin for the saw blade. Reassemble the saw and insert pin nails.
Drill two holes about one inch in from the end of the 1×2 paddle. Use a drill bit that will allow enough room for the paracord to pass through. Lace one end of the paracord through the two holes in a weaving fashion. Loop the paracord around the top ends of the two verticals. Pull tight and secure the cordage with a knot. I used a fisherman’s knot.
Wind the paddle in a circular motion to tighten the cordage. Once you are satisfied with the tension on the saw blade, allow the paddle to toggle on the cross beam.

Now you’re ready to test your inexpensive takedown bucksaw. I cut a 3 inch piece of dried poplar with ease in my shop. Even the 9 inch hickory log in my sawbuck was no match for this little beast. The Bacho dry wood saw blade is fantastic for processing large dry wood rounds!
To break the saw down, simple untwist the paracord and disassemble the frame. The entire saw can be wrapped in a large 100% cotton bandana and packed in your rucksack or backpack. You can always use a multipurpose bandana for other camping or wilderness self-reliance training.
While I’ll always carry my folding Bacho Laplander, this takedown bucksaw just made wood cutting tasks at my base camp much more convenient.
Here’s my video tutorial… and a short clip of my failed attempt with natural material. If you haven’t checked out my channel yet, we’d appreciate you subscribing, liking, and sharing any material you find valuable.
If you find value in our blog, Dirt Road Girl and I would appreciate your vote on Top Prepper Sites! You can vote daily by clicking here or on the image below. Check out all the other value-adding sites while you’re there…

Copyright: Content on this site (unless the work of a third-party) may be shared freely in digital form, in part or whole, for non-commercial use with a link back to this site crediting the author. All links in articles must remain intact as originally posted in order to be republished. If you are interested a third-party article, please contact the author directly for republishing information.
Keep Doing the Stuff of Self-Reliance,
by Todd Walker