


Weight – a unit of heaviness or mass; any heavy load, mass, or object; the vertical force experienced by a mass as a result of gravitation
Gravity. It’s unescapable… on this planet. It keeps us grounded. But it also weighs us down.
I consider myself to be in decent physical condition. Even so, at my age, every pound added to my backpack affects the gravitational pull and energy needed to carry the stuff. I’m no ultralight hiker by any stretch, but I do try to lighten my load every chance I get.
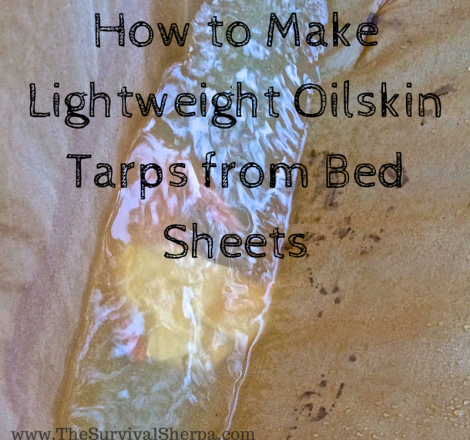
I’ve wanted to own an oilskin tarp for some time now. They’re durable but too pricey for our budget at this time. A quality oilskin tarp (new) will set you back $200. My motto, when it comes to gear, is buy the best you can afford. Or, go the common man route and make your own.
The idea for this project came from William Collins’ 4 part series on his YouTube channel. I’ve condensed his method into a short tutorial for you.
Related: Back To Basics: How To Make Rum At Home
Stuff You’ll Need
- 100% Egyptian cotton bed sheet (flat). The higher the tread count the better. I used a king size which measures 8.5′ x 9′.
- 20 oil lamp wicks (1/2″ x 6″). They come in packs of 5 at Wally World.
- Boiled linseed oil – 3 to 4 cups (depending on the size of your cloth)
- Mineral spirits – 3 to 4 cups
- Dye (optional) unless your sheet is the color you desire
- Containers
- Heat source
- Rubber gloves
Prep the sheet: Before the dyeing process begins, wash the sheet in cold water and washing powder. Then dry on high heat to close and tighten the woven fibers in the sheet.
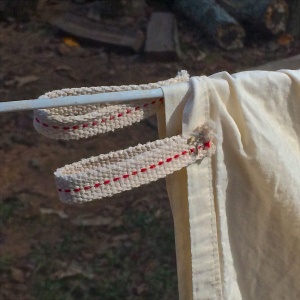
Sew the lamp wicks on all corners and at two foot intervals along the edges. I sewed these on by hand. A sewing machine would take less time but that’s how I roll. I added 3 additional loops down the center of the sheet to allow for more options when configuring my tarp.
Step 1: Making Natural Dye
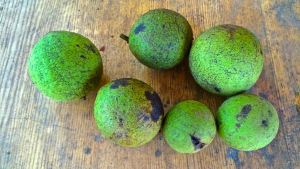
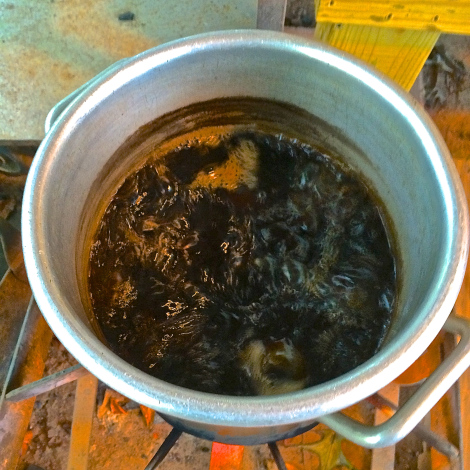
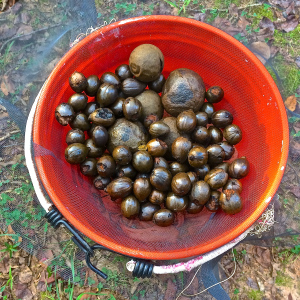
I filled the bottom of a 10 inch pot with green hickory nuts from a tree in our yard. Thank you, squirrels! Use an old pot that you don’t mind staining. I then added several black walnuts (green hulled) to the mix which happen to be dropping from trees now.
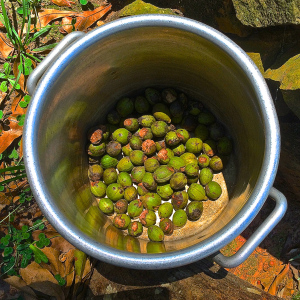
With the dyeing agent (green nuts) in the pot, fill 3/4 full with water. Bring to a boil on an outdoor fire. Allow to slow boil for an hour or more. The longer you boil, the darker your dye will become. I was going for an earth tone.
You can also break the green hulls off the black walnuts to increase the surface area and improve the extraction process. Be aware that the hulls will stain anything they touch – skin included.
If you choose not to make your own natural dye, RIT dye is available at most grocery stores.
Step 2: Dye the Sheet
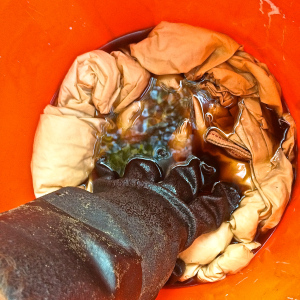
Test the color of your dye on a piece of scrap cloth. If you’re satisfied, strain the dye mixture into a clean container. A window screen over a bucket works well.
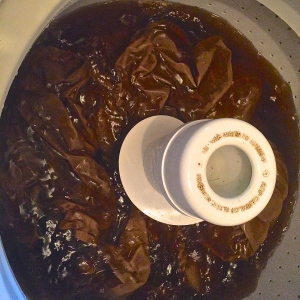
Place the sheet into the container. Use rubber gloves to prevent staining your hands. Turn and squeeze the material for a thorough coverage.
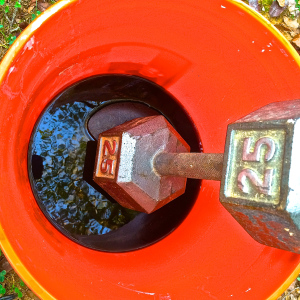
Leave the sheet in the dye for 24 hours. Longer for a darker color. To keep the sheet submerged, I place the lid of cast iron dutch oven on top. Not recommended. The greasy drip spikes on the lid left a polka dot stain pattern on the bed sheet. What was I thinking!? I replaced the heavy lid with one of DRG’s small dinner plates and a 25 lb. dumbbell.
Step 3: Set the Dye
Wring the sheet over the container to remove the excess dye. I hung mine over a double clothes line out back to dry.
Related: Back To Basics: How To Make Sugar At Home
Once dry, wash it in cold water with washing powder when your wife isn’t home. No, it won’t stain the washing machine tub. The cold water sets the dye. Dry the sheet on high in preparation for the waterproofing.
Step 4: Waterproofing
Mix equal parts boiled linseed oil and mineral spirits (drying agent) in a container. I used a 5 gallon bucket. You only need enough to completely saturate the cloth. I used two cups of each and found dry spots on the sheet. Another cup of each did the trick. Other DiY’ers have “painted” the oil on their cloth. For the best coverage, message the oil into the material in a bucket. You’ll probably want gloves for this step.
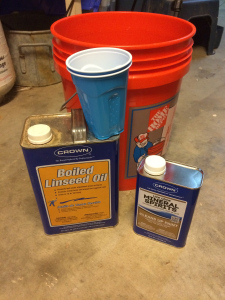
Squeeze the excess mixture from the sheet back into the bucket. Funnel the extra waterproofing liquid in a smaller container and label it for later projects. I used the empty mineral spirits can.
Note on boiled linseed oil: Properly dispose of any oil soaked rags used to wipe spills. As the linseed oil dries, it creates heat and can combust spontaneously.

Worried about burning down your shop or barn while the tarp hangs to dry? Don’t be. Spreading the tarp to dry dissipates the heat.
Step 5: Cure the Sheet
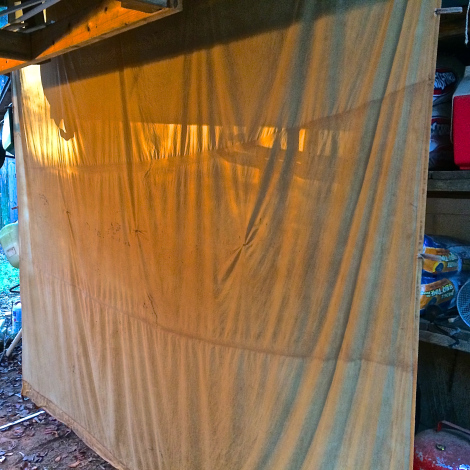
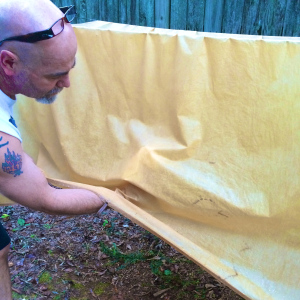
Hang the oiled sheet vertically under a covered roof outside. In a hurry, I laid my sheet over the double clothes line. This method created two lines down the middle section of the sheet. Plus, it rained that evening. Dumb move. The next morning, water was standing on the sheet between the two lines. I hung the sheet under my attached shed behind my shop the next day.
The drying time on the oiled sheet depends on humidity. Well, it rained for three days after I applied the oil. You guessed it, the tarp stayed tacky. When the weather cleared, it dried in 48 hours.
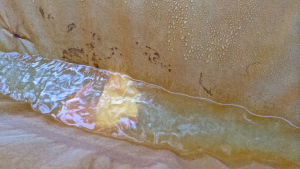
Now for the moment of truth… is it waterproof?
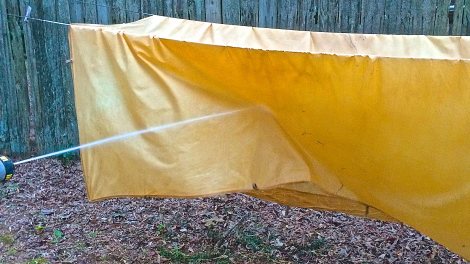
I hung the dried tarp on the clothes line and unreeled the garden hose. I set the nozzle on “shower” and pulled the trigger. This was my common rain shower test. It passed! No moisture behind the tarp when wiped with a paper towel.
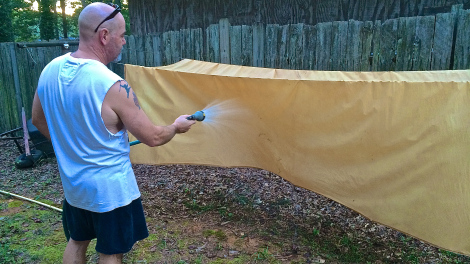
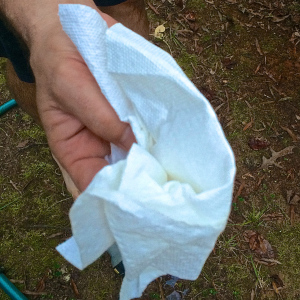
Now for the hurricane test. I set the hose to “jet” from three feet away and blasted the tarp. The paper towel underneath remained bone dry!
Even with standing water between the clothes line, no drips or moisture anywhere. Good to know the tarp could be used to harvest water in a survival scenario!
As far as durability, I’m pretty sure my bed sheet tarp won’t outlast an eight ounce canvas oilskin tarps. Maybe it will. Time will tell. I’m testing it this weekend at the Pathfinder School Basic Class. I’ll update y’all on its performance.
Related: 8 DIY Survival Projects Out Of Plastic Bottles
Keep Doing the Stuff of Self-Reliance,
by Todd Walker